



GCP
Connecting NeuBird to your Google Cloud Platform (GCP) environment enables collection of telemetry data such as resource configurations, audit logs, and metrics. The scope of data accessible depends on the permissions granted to the service account used for the connection.
Step 1: Create a Service Account in GCP
Section titled “Step 1: Create a Service Account in GCP”Create a service account that NeuBird will use to access your GCP resources.
-
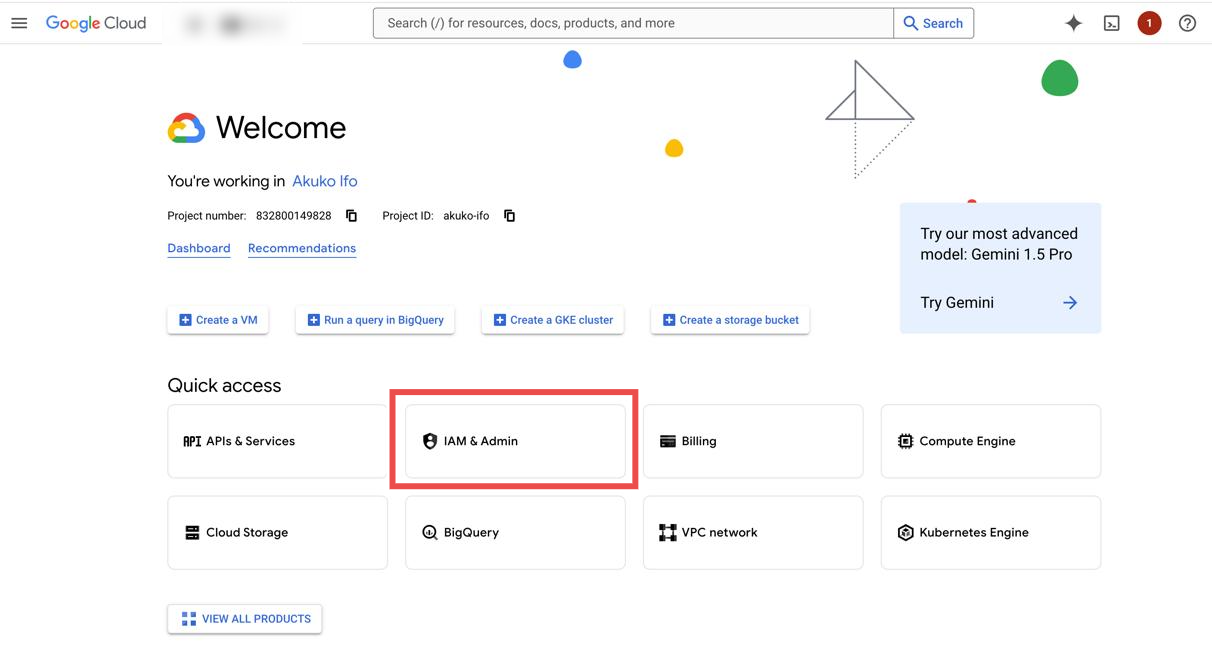
Access IAM & Admin: Navigate to the IAM & Admin section in the GCP Console.
-
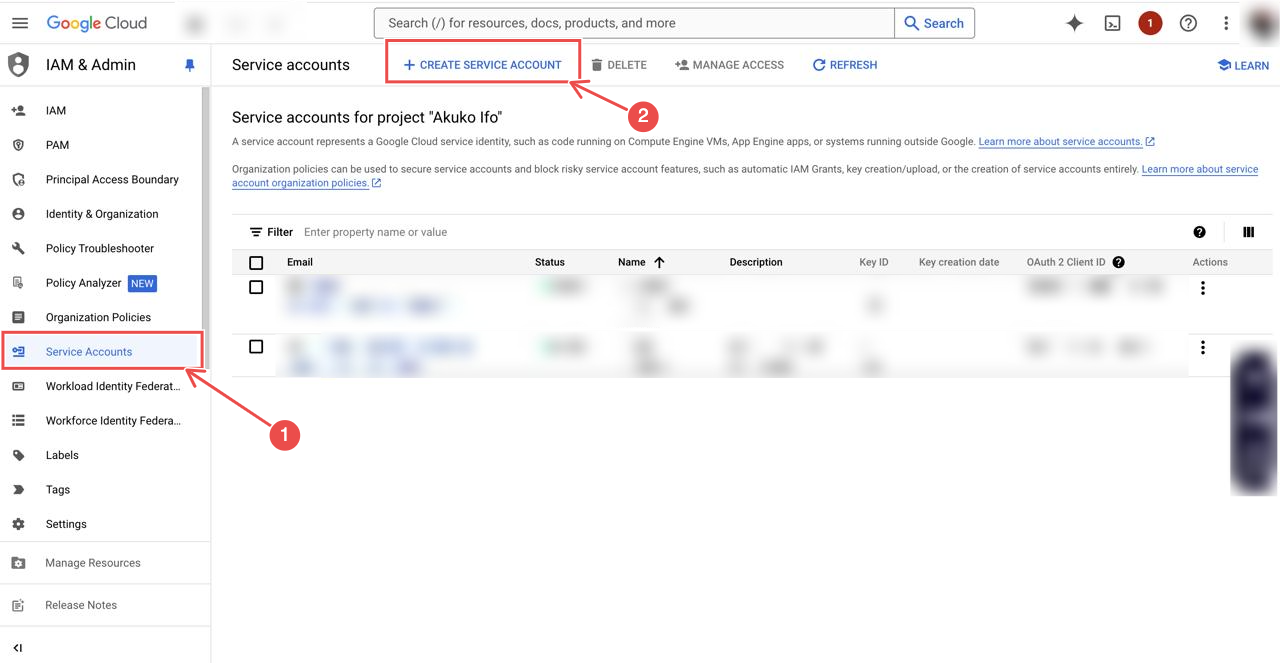
Create a new service account: In the IAM & Admin dashboard, select Service Accounts > Create Service Account.
-
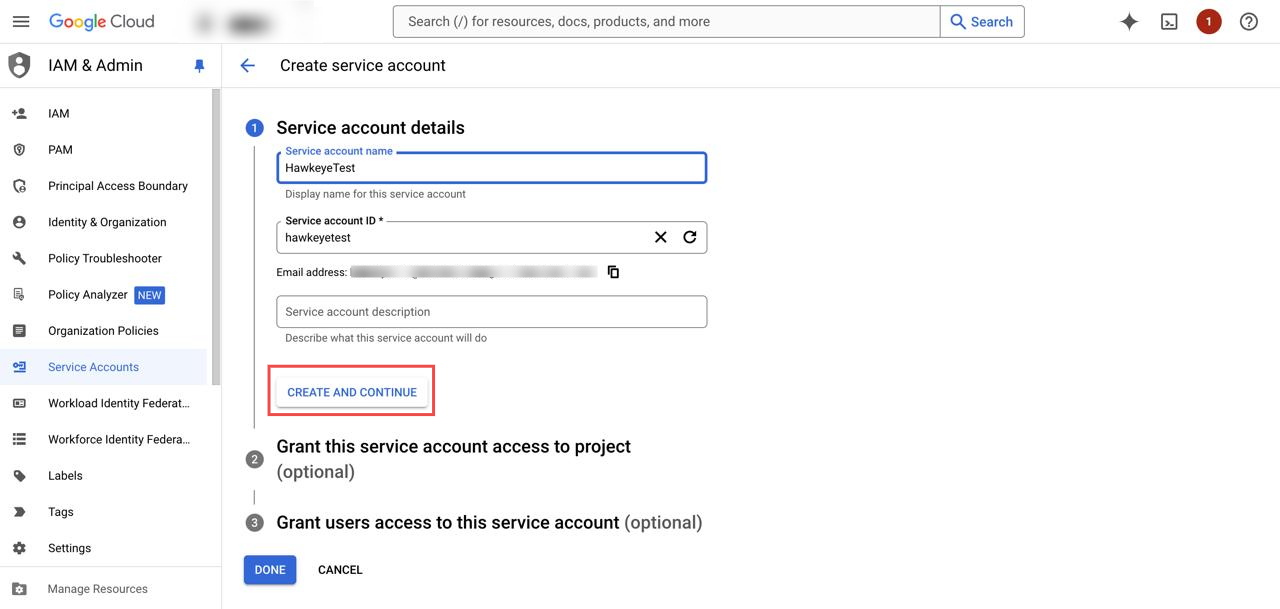
Configure the service account: Enter a Name for the service account and optionally a description. Click Create and Continue.
-
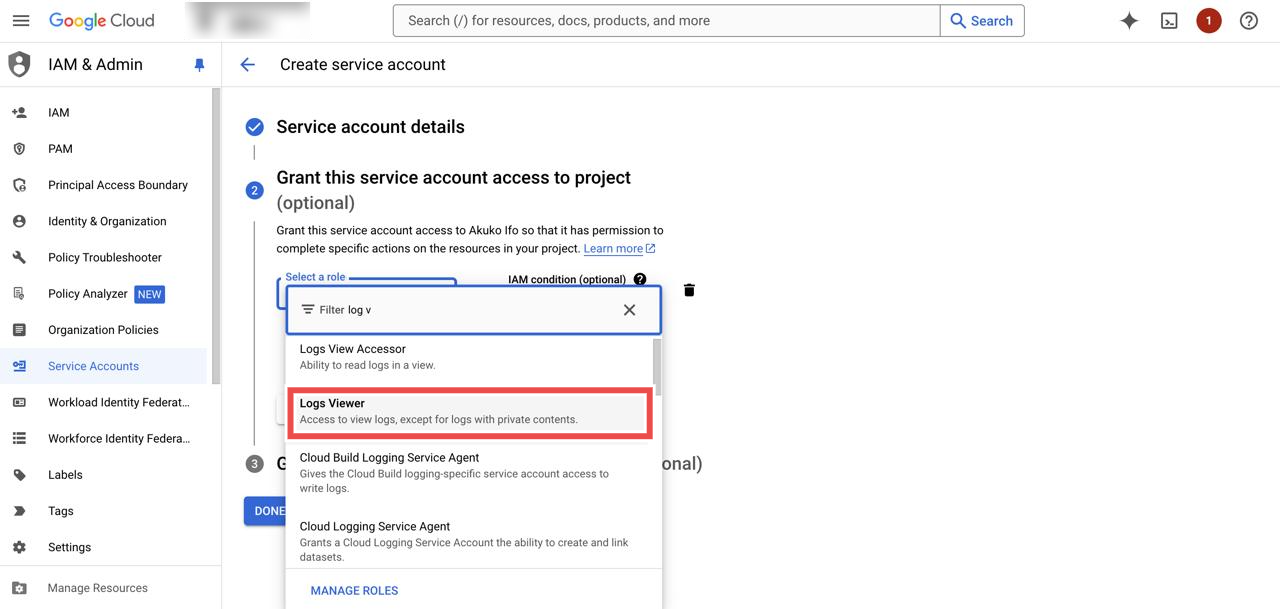
Assign roles to the service account: Assign the following roles:
-
Viewer: Needed for config, logs, and metrics data.
-
Logs Viewer: To access logs.
-
Kubernetes Engine Cluster Viewer: Needed for Kubernetes access to get config for clusters.
-
Monitoring Viewer: Read-only access to get and list monitoring (metrics) data and configuration.
-
BigQuery Data Viewer: Needed if you integrate with BigQuery.
-
MCP Tool User (
roles/mcp.toolUser): Grants themcp.tools.callpermission, which lets NeuBird call tools on any MCP server enabled by the parent project.
Note: NeuBird requires BigQuery to be enabled to ensure accurate analysis.
-
-
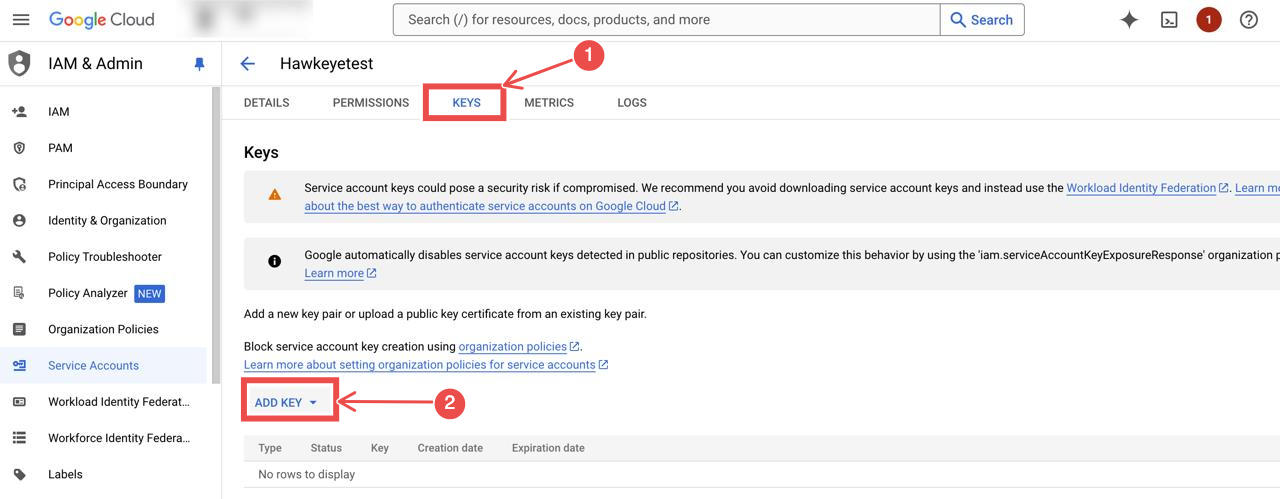
Create a key for the service account: After assigning roles, create a new key for the service account in JSON format. This key will be downloaded to your machine and used to authenticate the connection.
-
Store the service account key: Safeguard this key, as it will be required when configuring the connection.
Step 2 (Optional): Use Workload Identity Federation instead of a service account key
Section titled “Step 2 (Optional): Use Workload Identity Federation instead of a service account key”Workload Identity Federation (WIF) lets an external identity (for example, an IAM role in the AWS account where NeuBird is deployed) authenticate to GCP without a long-lived service account key — similar in spirit to AWS’s external ID for cross-account roles. This is optional: skip it if the JSON key from Step 1 works for your environment.
-
Create an Identity Pool: In the GCP console, navigate to IAM & Admin > Workload Identity Federation, and create an Identity Pool.
-
Configure an Identity Provider: Add an identity provider to establish trust between the external environment and GCP.
-
Link to Service Account: Attach the Workload Identity Federation to the service account you created in Step 1, allowing external entities to authenticate and access GCP resources.
-
Generate a credential configuration file: Use
gcloud iam workload-identity-pools create-cred-config(or the equivalent console flow) to generate the credential configuration JSON for your provider. This file — not a service account key — is what you’ll use to connect.Paste the full contents of this file into the connection’s Service Account Key field in place of a JSON key; the field accepts either. Since a WIF credential configuration doesn’t embed a project ID, you must also set Project ID explicitly on the connection.
Connection Fields
Section titled “Connection Fields”| Field | Required | Description |
|---|---|---|
| Name | Yes | A descriptive name for the connection |
| Description | No | A brief description of the connection |
| Service Account Key | Yes | The JSON key file generated for the service account in Step 1, or the Workload Identity Federation credential configuration from Step 2 |
| Project ID | Yes | The GCP project ID where the service account resides |
| Region | Yes | The GCP region where your resources are located |
For general instructions on creating and managing connections, see the Connections Overview.