

AWS
Connecting NeuBird to your AWS environment enables collection of resource configurations, CloudTrail change events, CloudWatch metrics, logs, and alarms. The scope of data NeuBird can access depends on the permissions assigned to the AWS role.
NeuBird follows AWS best practices by using an assumed role with an external ID for secure, read-only access.
Step 1: Create an IAM Role
Section titled “Step 1: Create an IAM Role”You can create the role using the AWS CLI (recommended for automation) or the AWS Console (recommended for most users).
Option A: AWS CLI
Section titled “Option A: AWS CLI”Open CloudShell from the terminal icon at the top of the AWS Console and run:
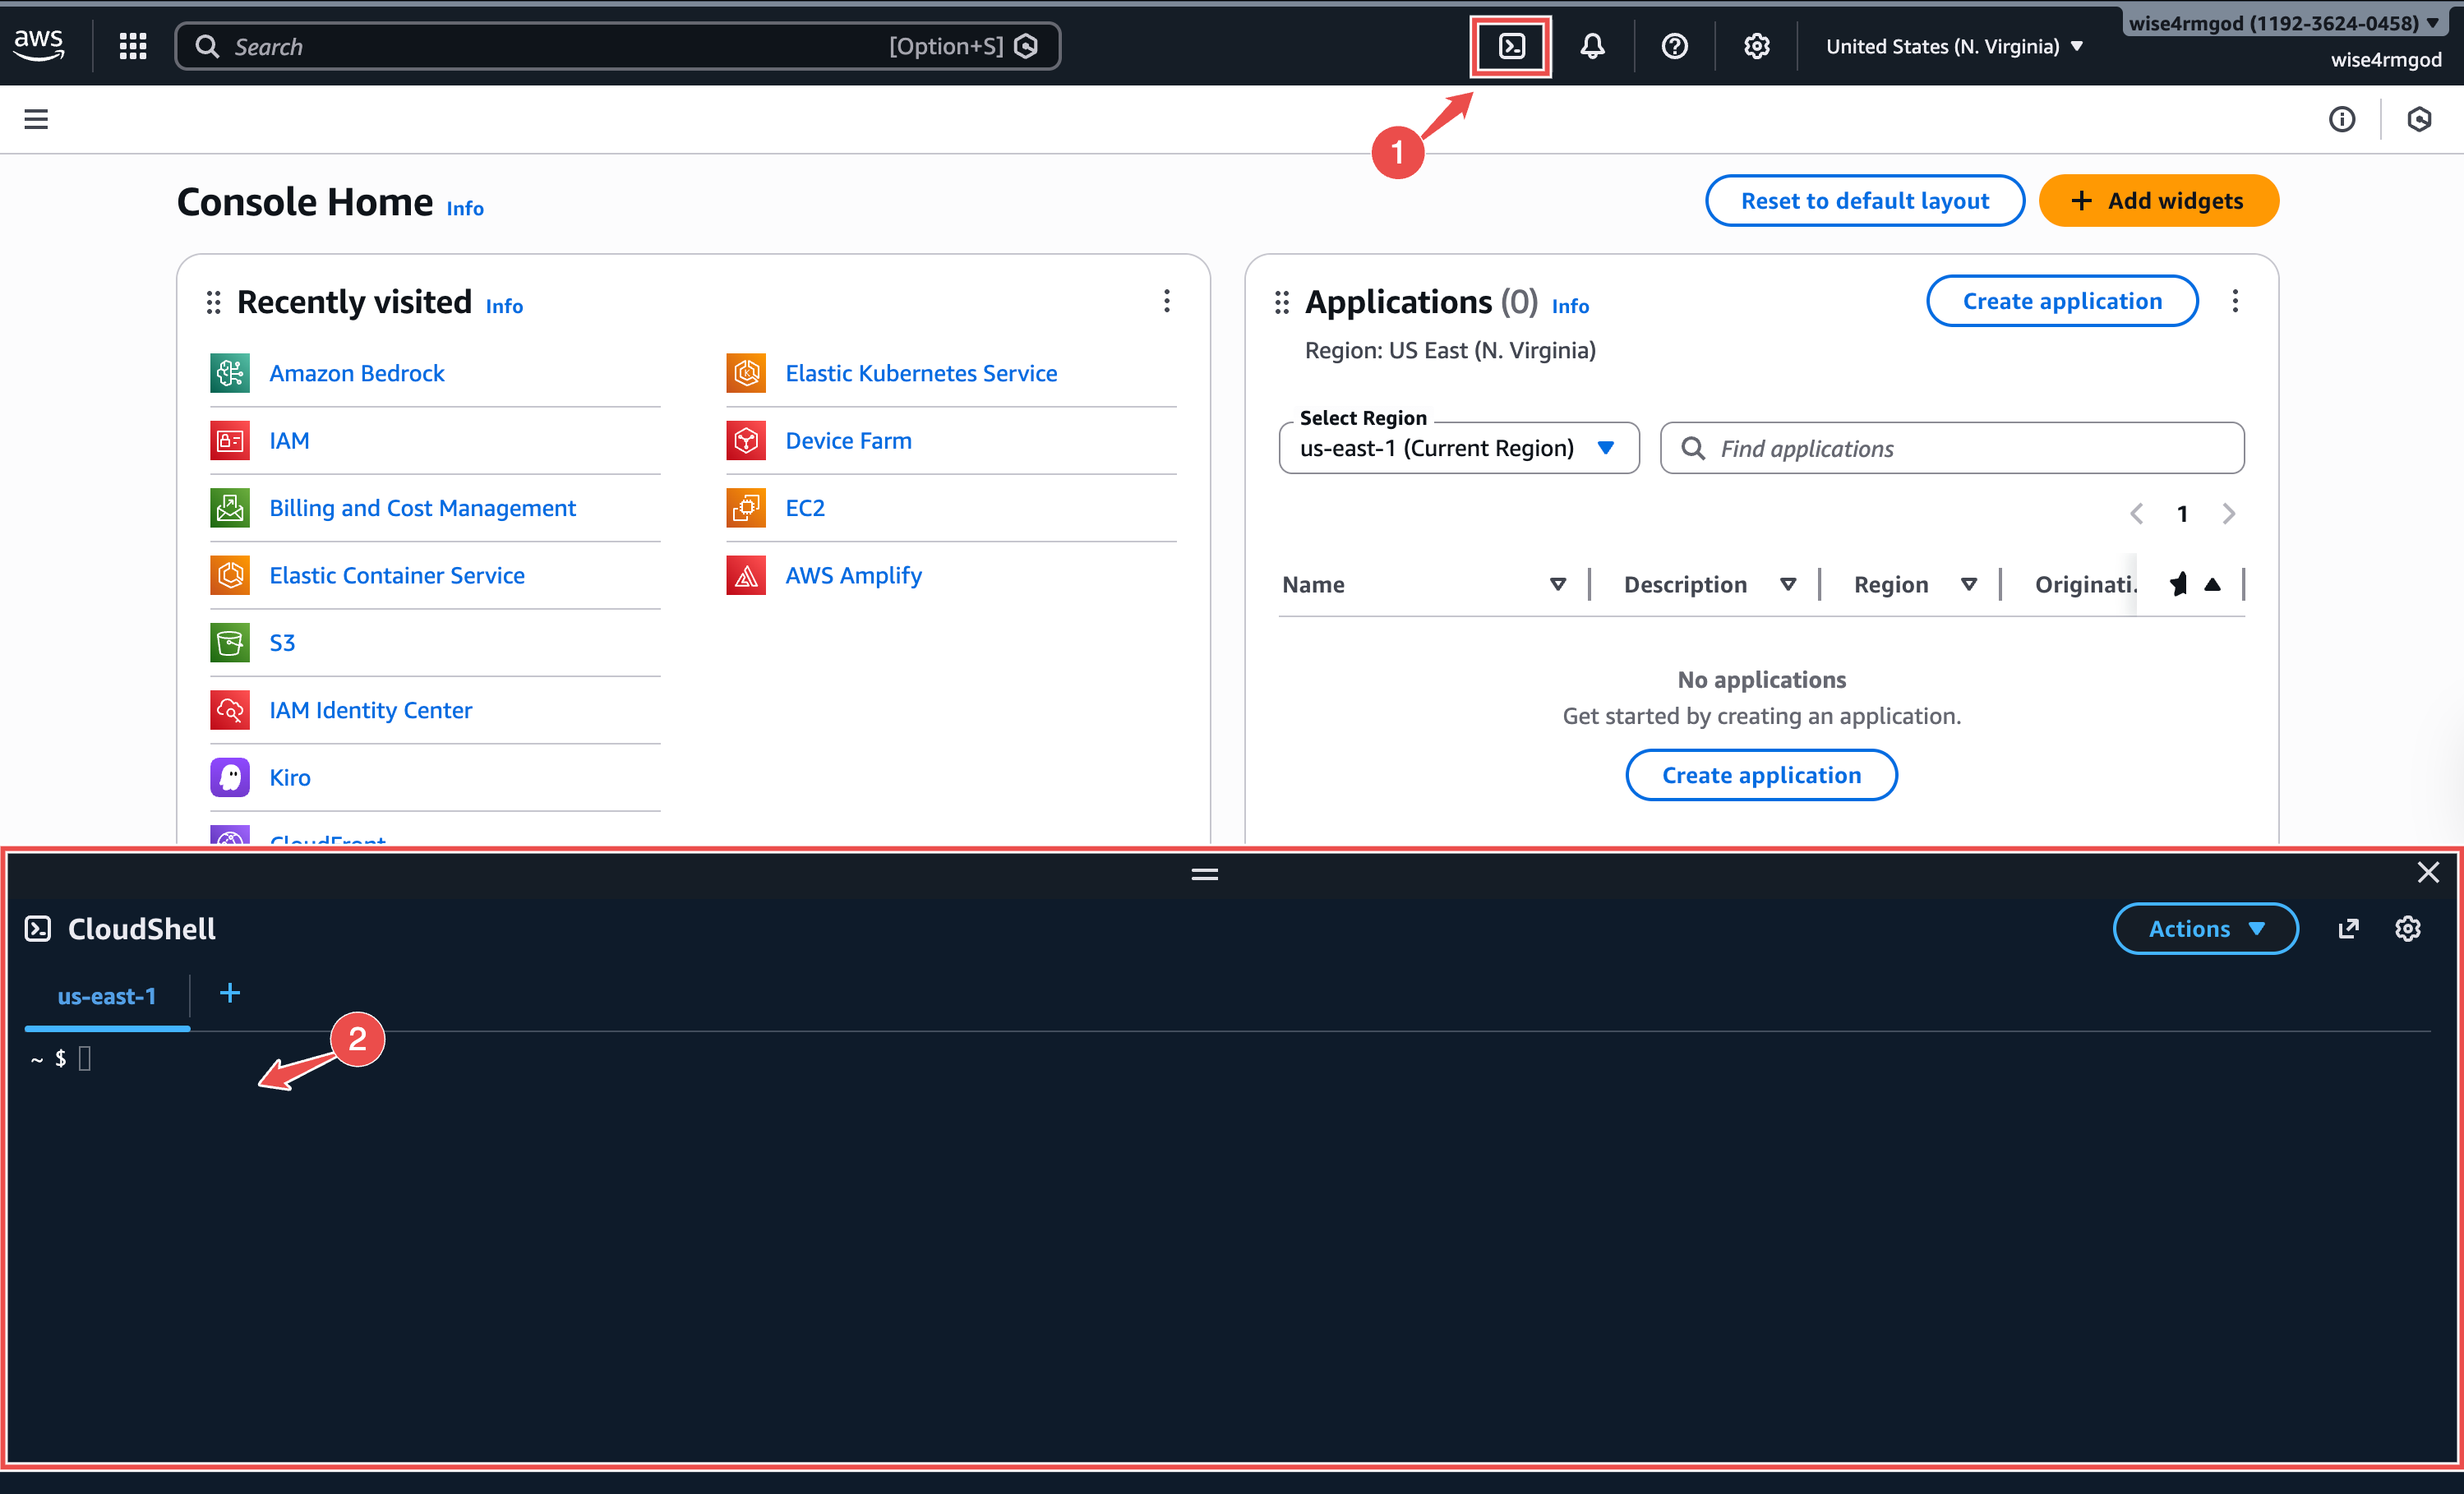
aws iam create-role \  --role-name NeuBird \  --assume-role-policy-document '{    "Version": "2012-10-17",    "Statement": [{      "Effect": "Allow",      "Principal": { "AWS": "arn:aws:iam::905418326654:root" },      "Action": "sts:AssumeRole",      "Condition": {        "StringEquals": { "sts:ExternalId": "YOUR_EXTERNAL_ID" }      }    }]  }' \  --description "NeuBird read-only access"
aws iam attach-role-policy \  --role-name NeuBird \  --policy-arn arn:aws:iam::aws:policy/ReadOnlyAccess
aws iam get-role --role-name NeuBird --query 'Role.Arn' --output text
Replace YOUR_EXTERNAL_ID with the External ID shown in the NeuBird connection dialog.
What this does:
- Creates an IAM role called
NeuBirdthat allows AWS account905418326654(NeuBird) to assume it, verified by an external ID- Attaches the AWS-managed
ReadOnlyAccesspolicy — NeuBird can view but not modify your resources- Outputs the Role ARN you’ll need for the connection
Option B: AWS Console
Section titled “Option B: AWS Console”-
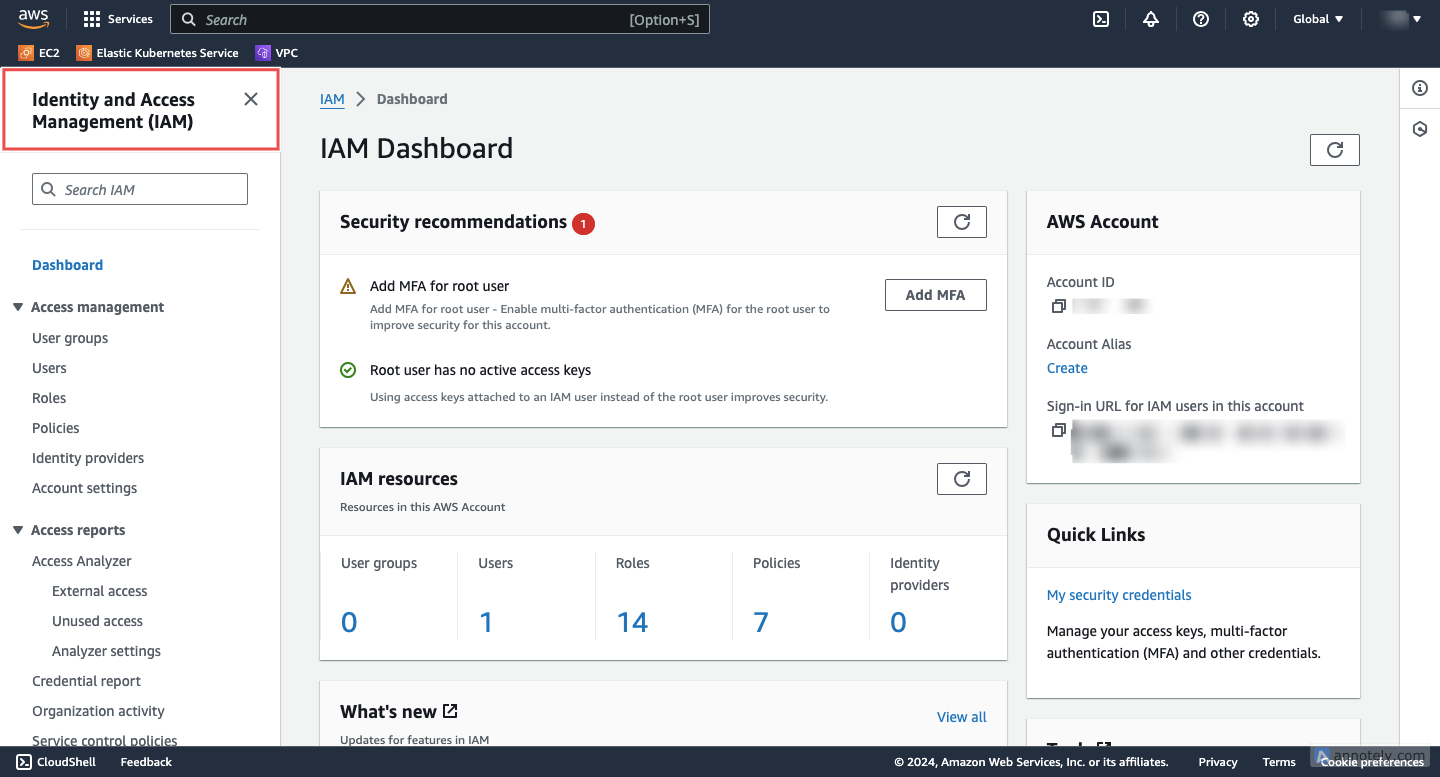
Access IAM: Navigate to the IAM service in the AWS Console.
-
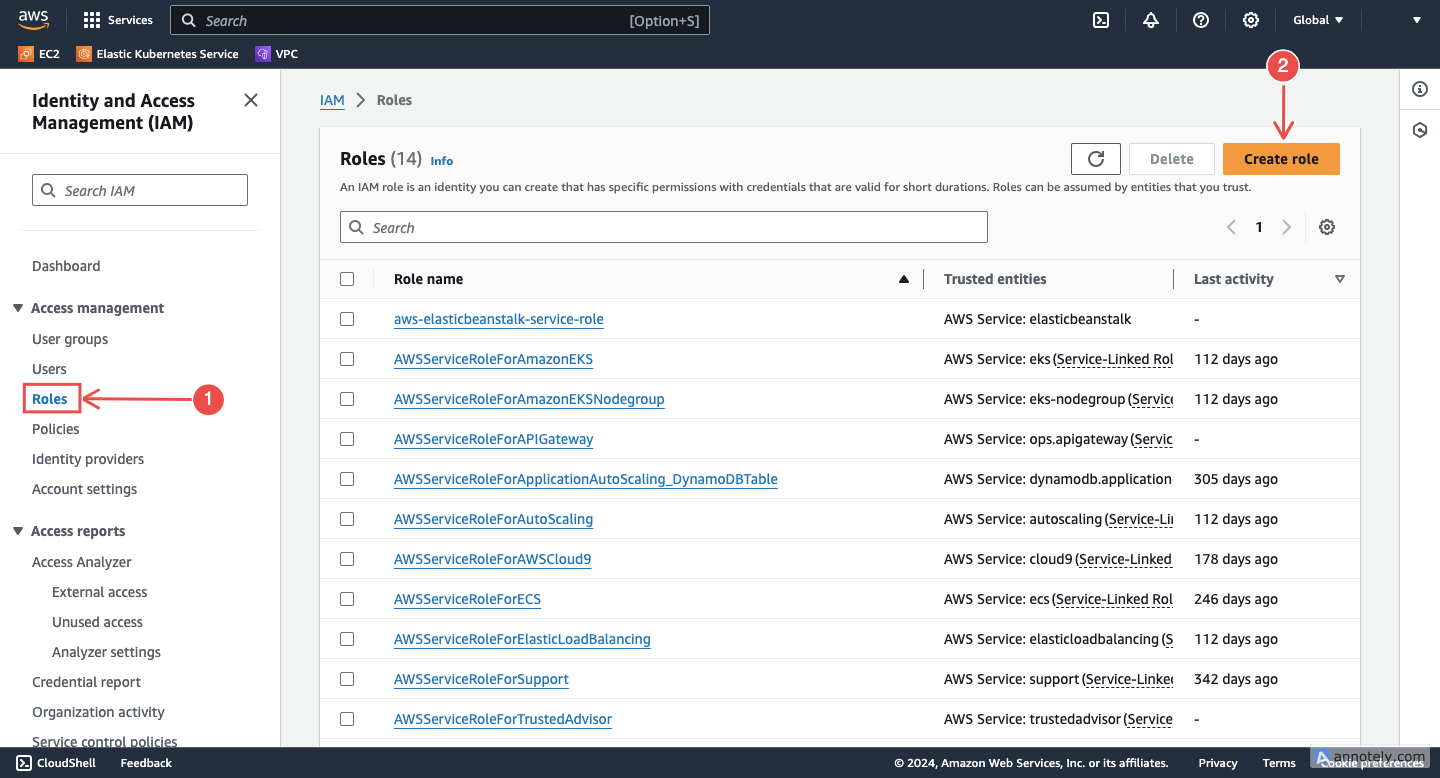
Create a new role: In the navigation pane, choose Roles > Create role.
-
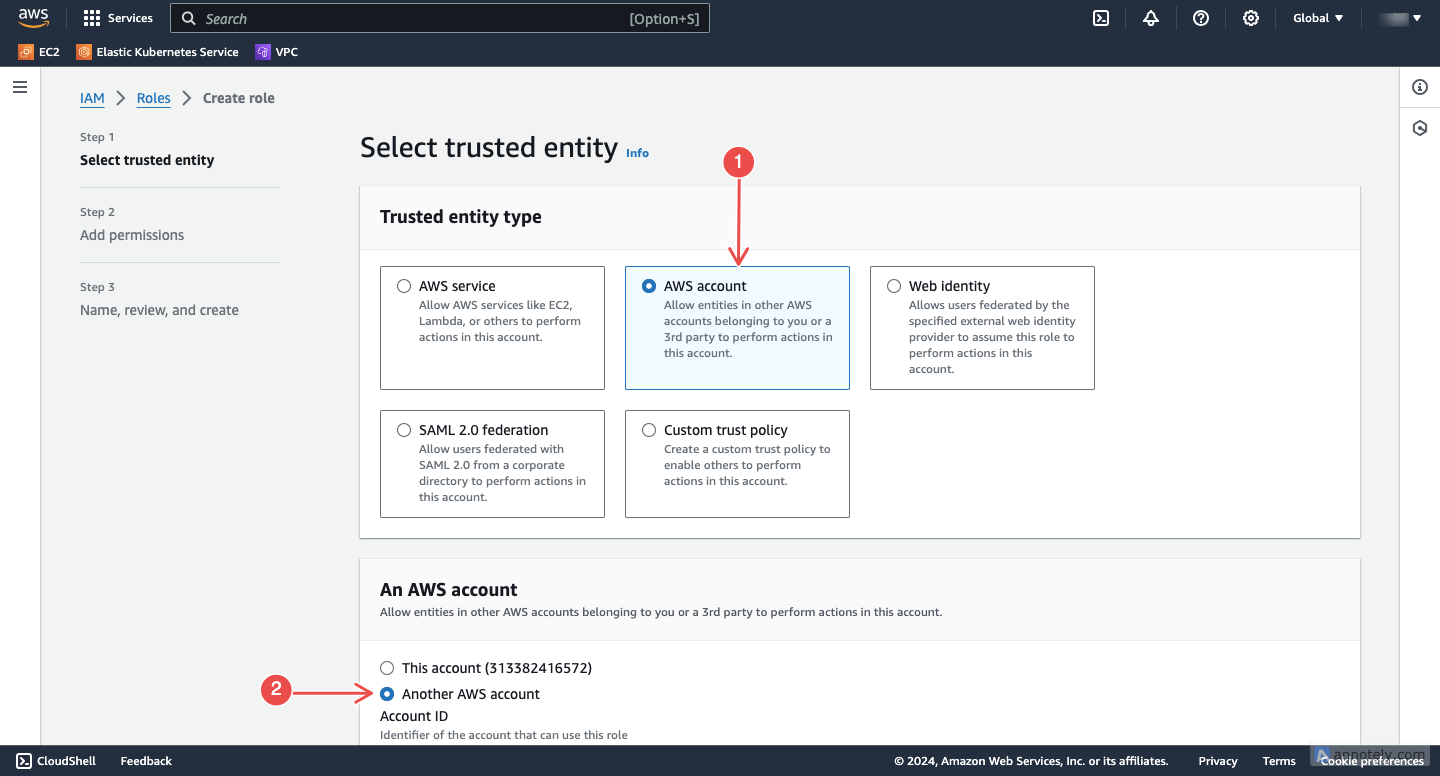
Choose trusted entity: Select Another AWS account as the type of trusted entity.
-
Enter credentials:
- Account ID: Enter
905418326654(NeuBird’s AWS account) - External ID: Copy the External ID from the NeuBird connection dialog and paste it here
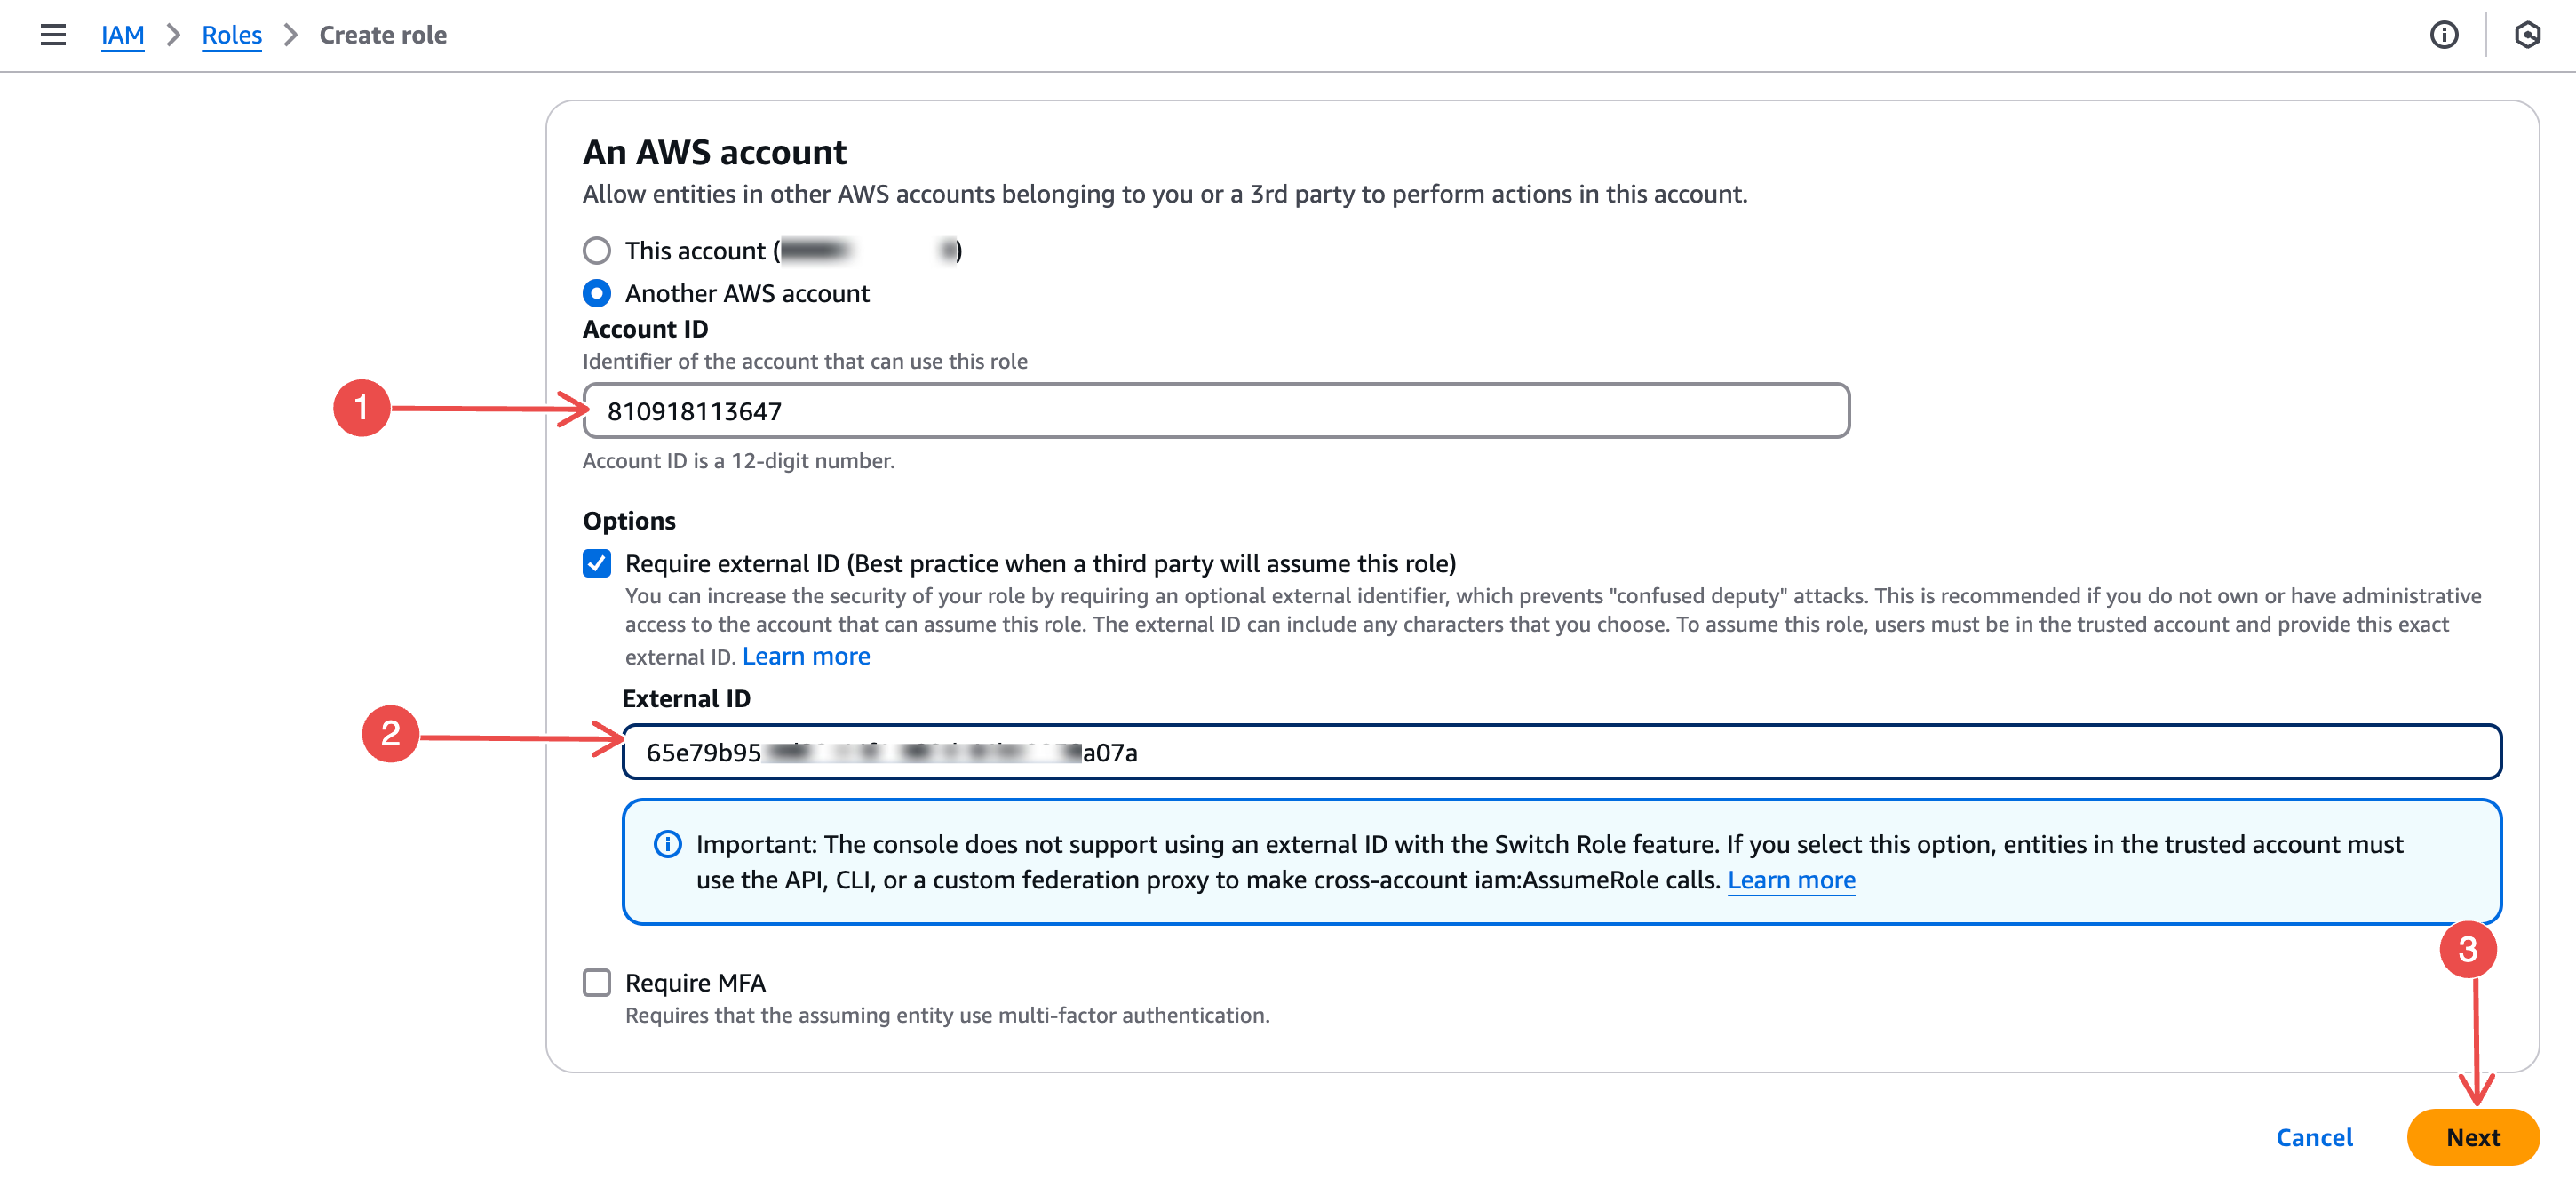
Click Next to continue.
- Account ID: Enter
-
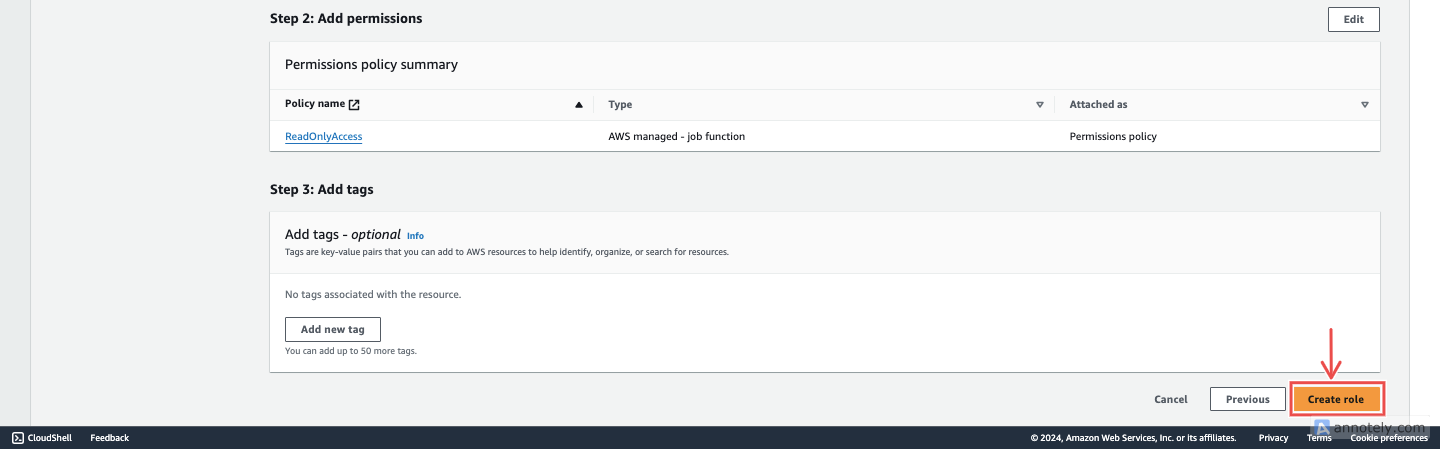
Assign permissions: Filter by AWS managed - job function and select ReadOnlyAccess.
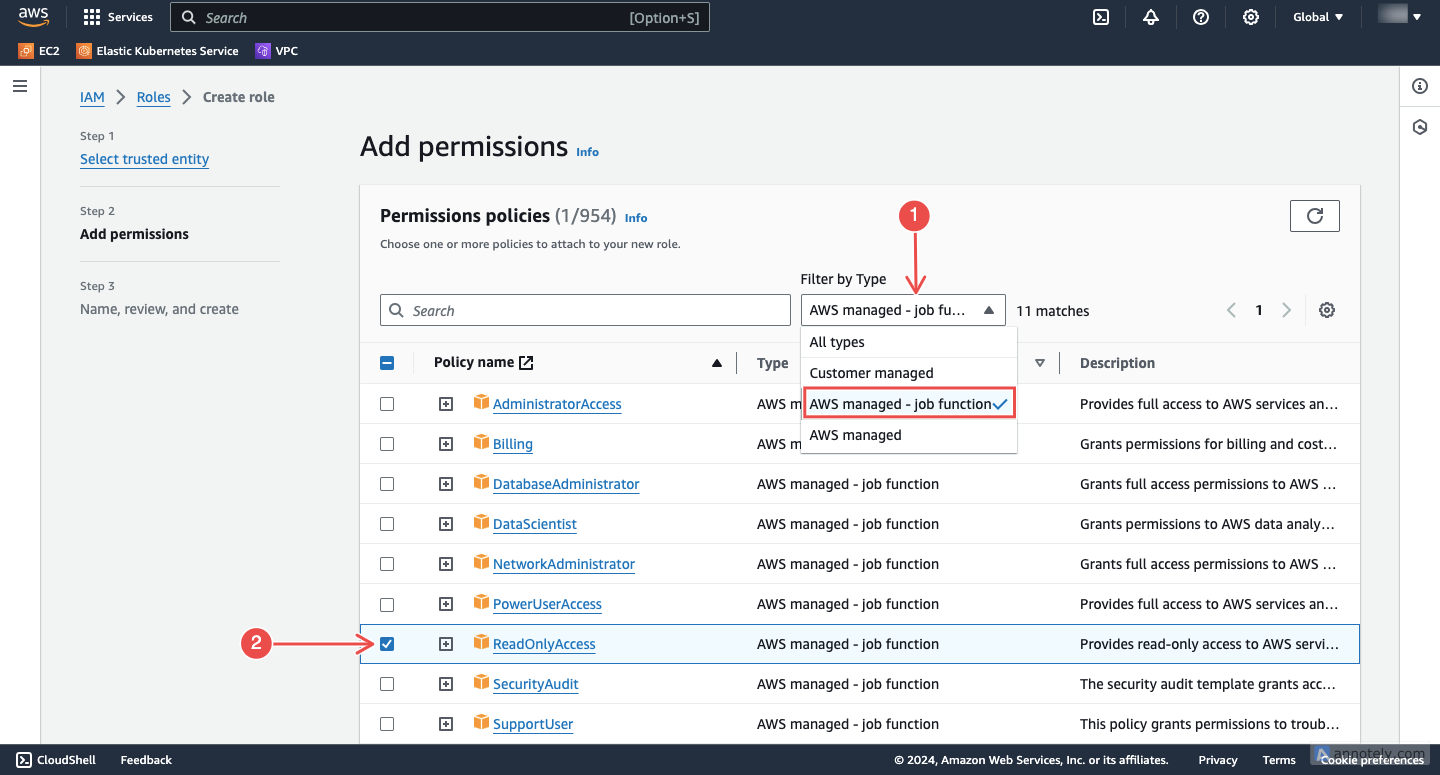
Click Next to continue.
-
Review and create: Enter a name (e.g.
NeuBird) and description, review the configuration, then click Create role.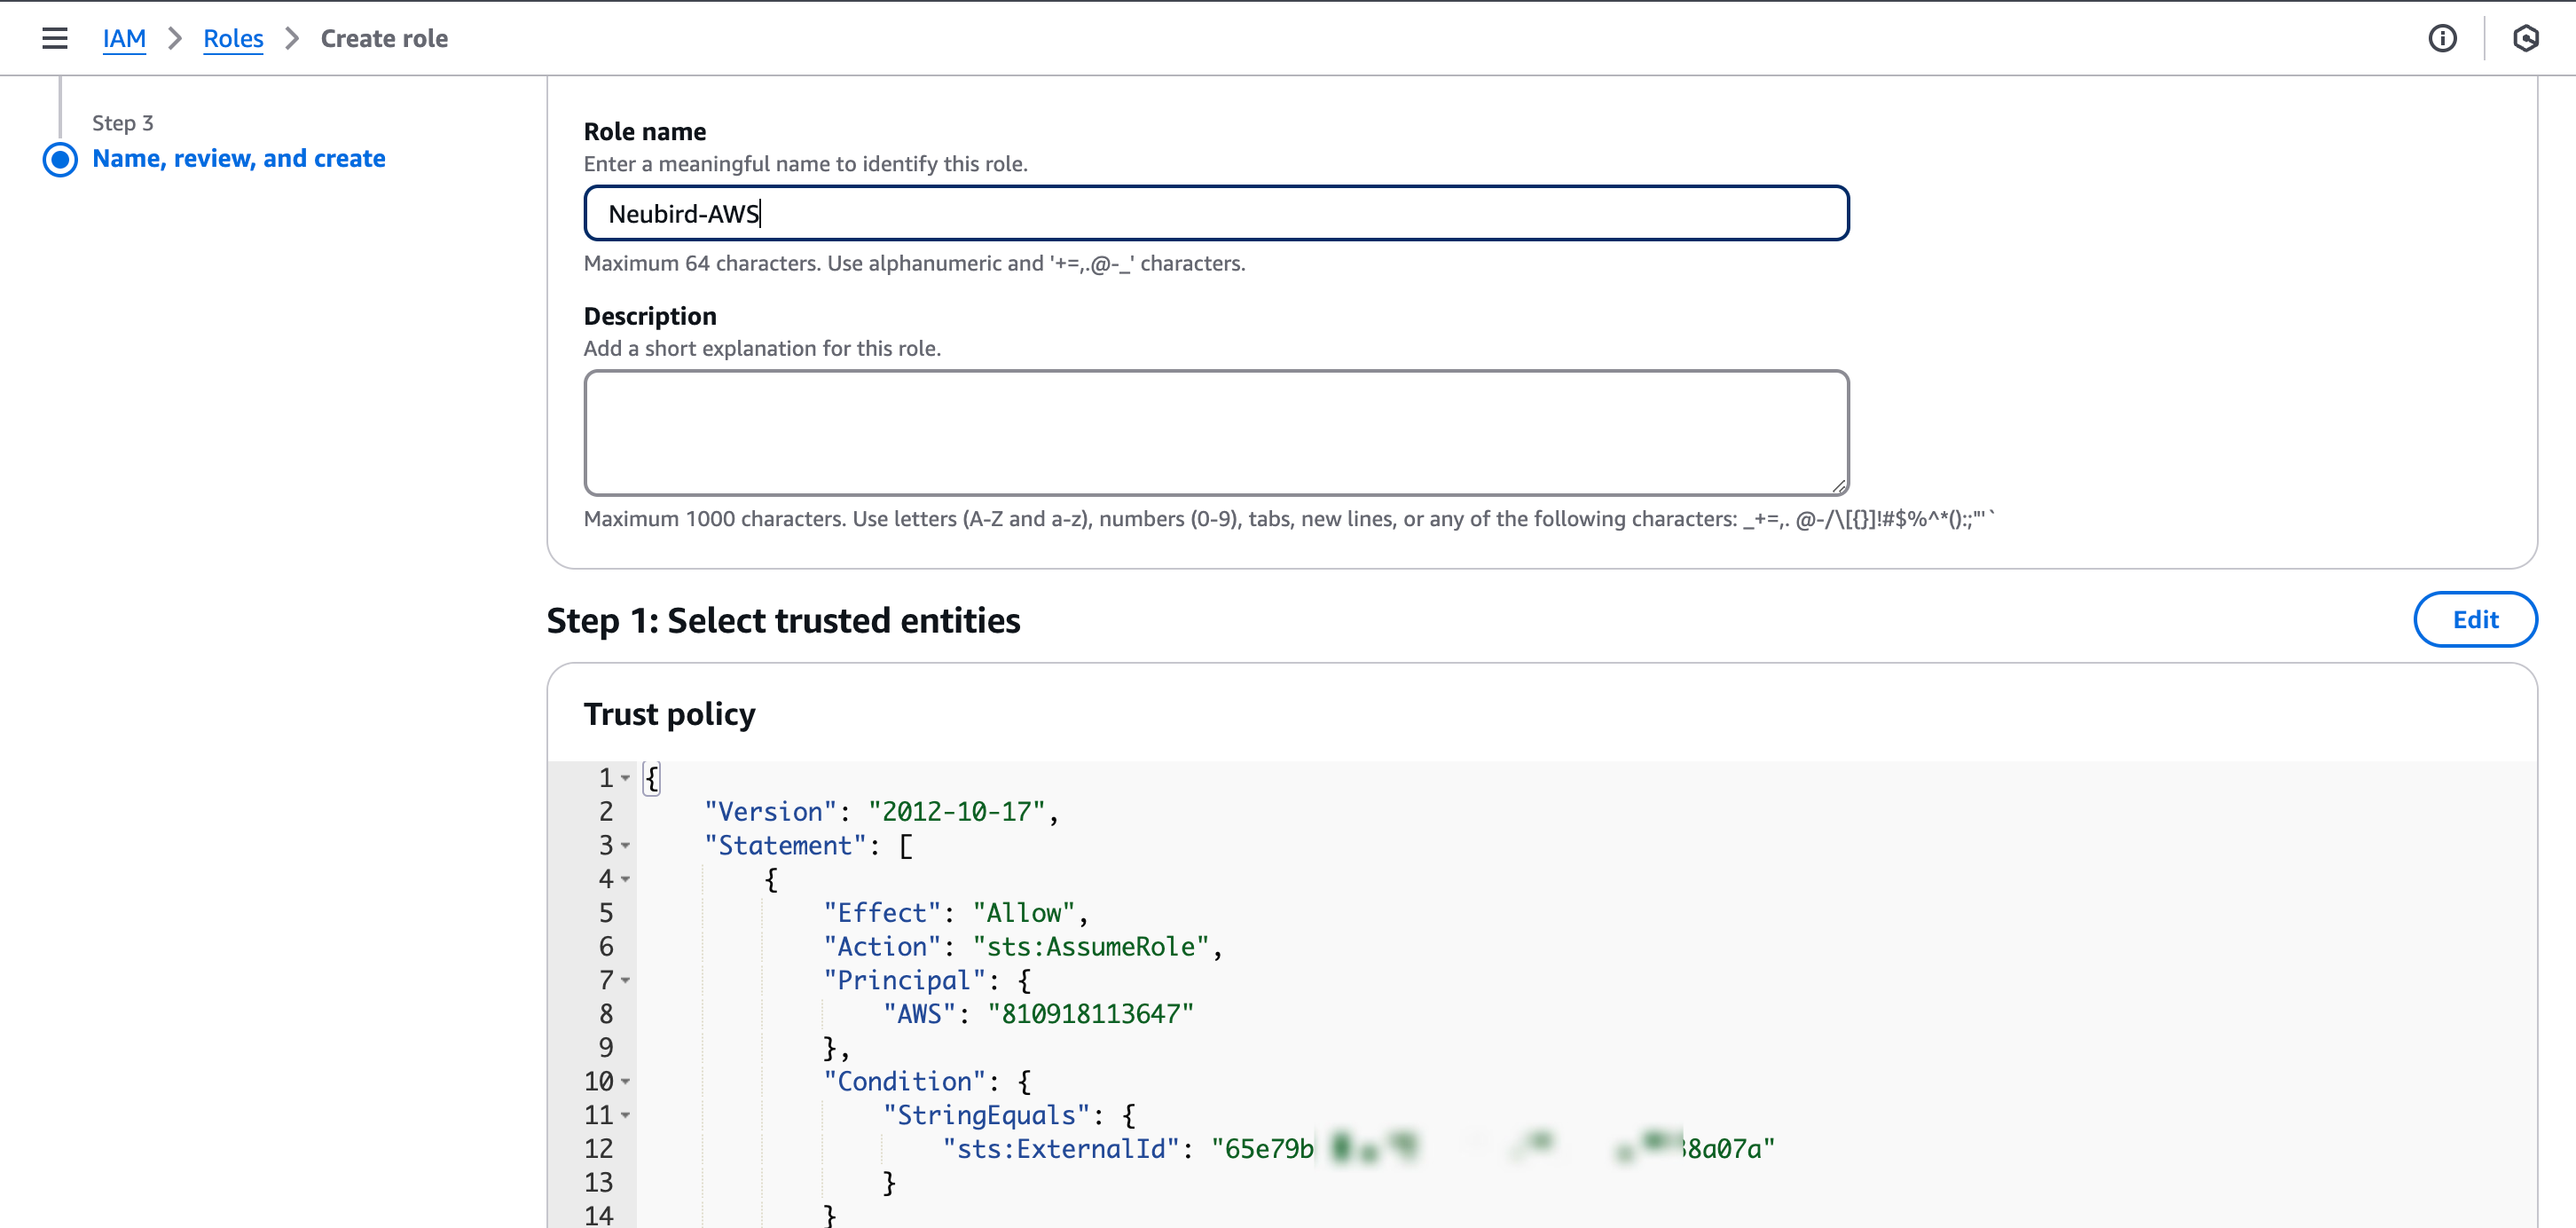
-
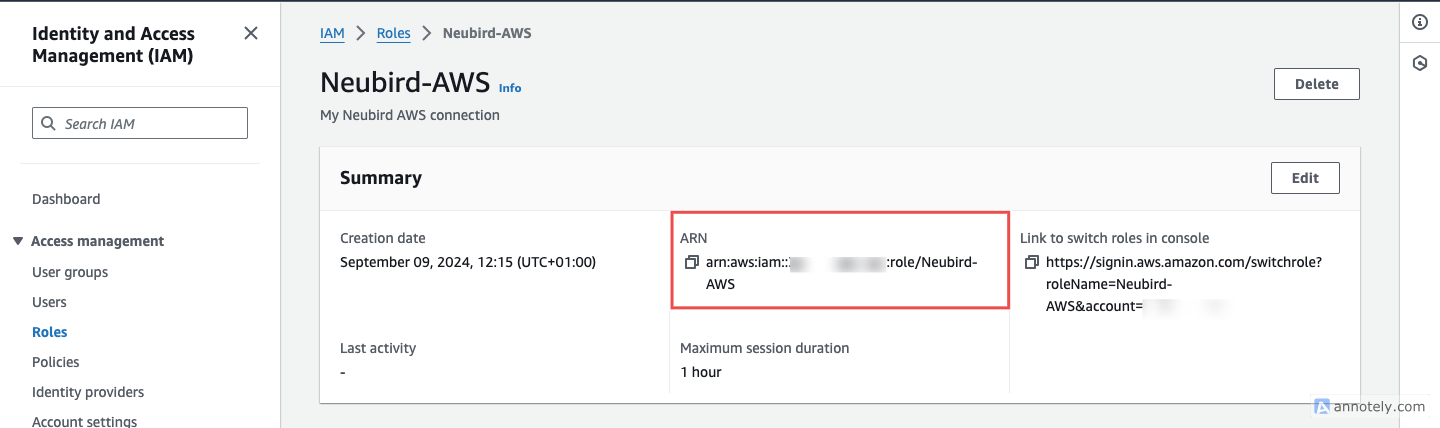
Copy the Role ARN: Open the newly created role and copy the Role ARN.
Step 2: Add Kubernetes (EKS) Access
Section titled “Step 2: Add Kubernetes (EKS) Access”Skip this step if you don’t use EKS.
For each EKS cluster you want NeuBird to monitor:
-
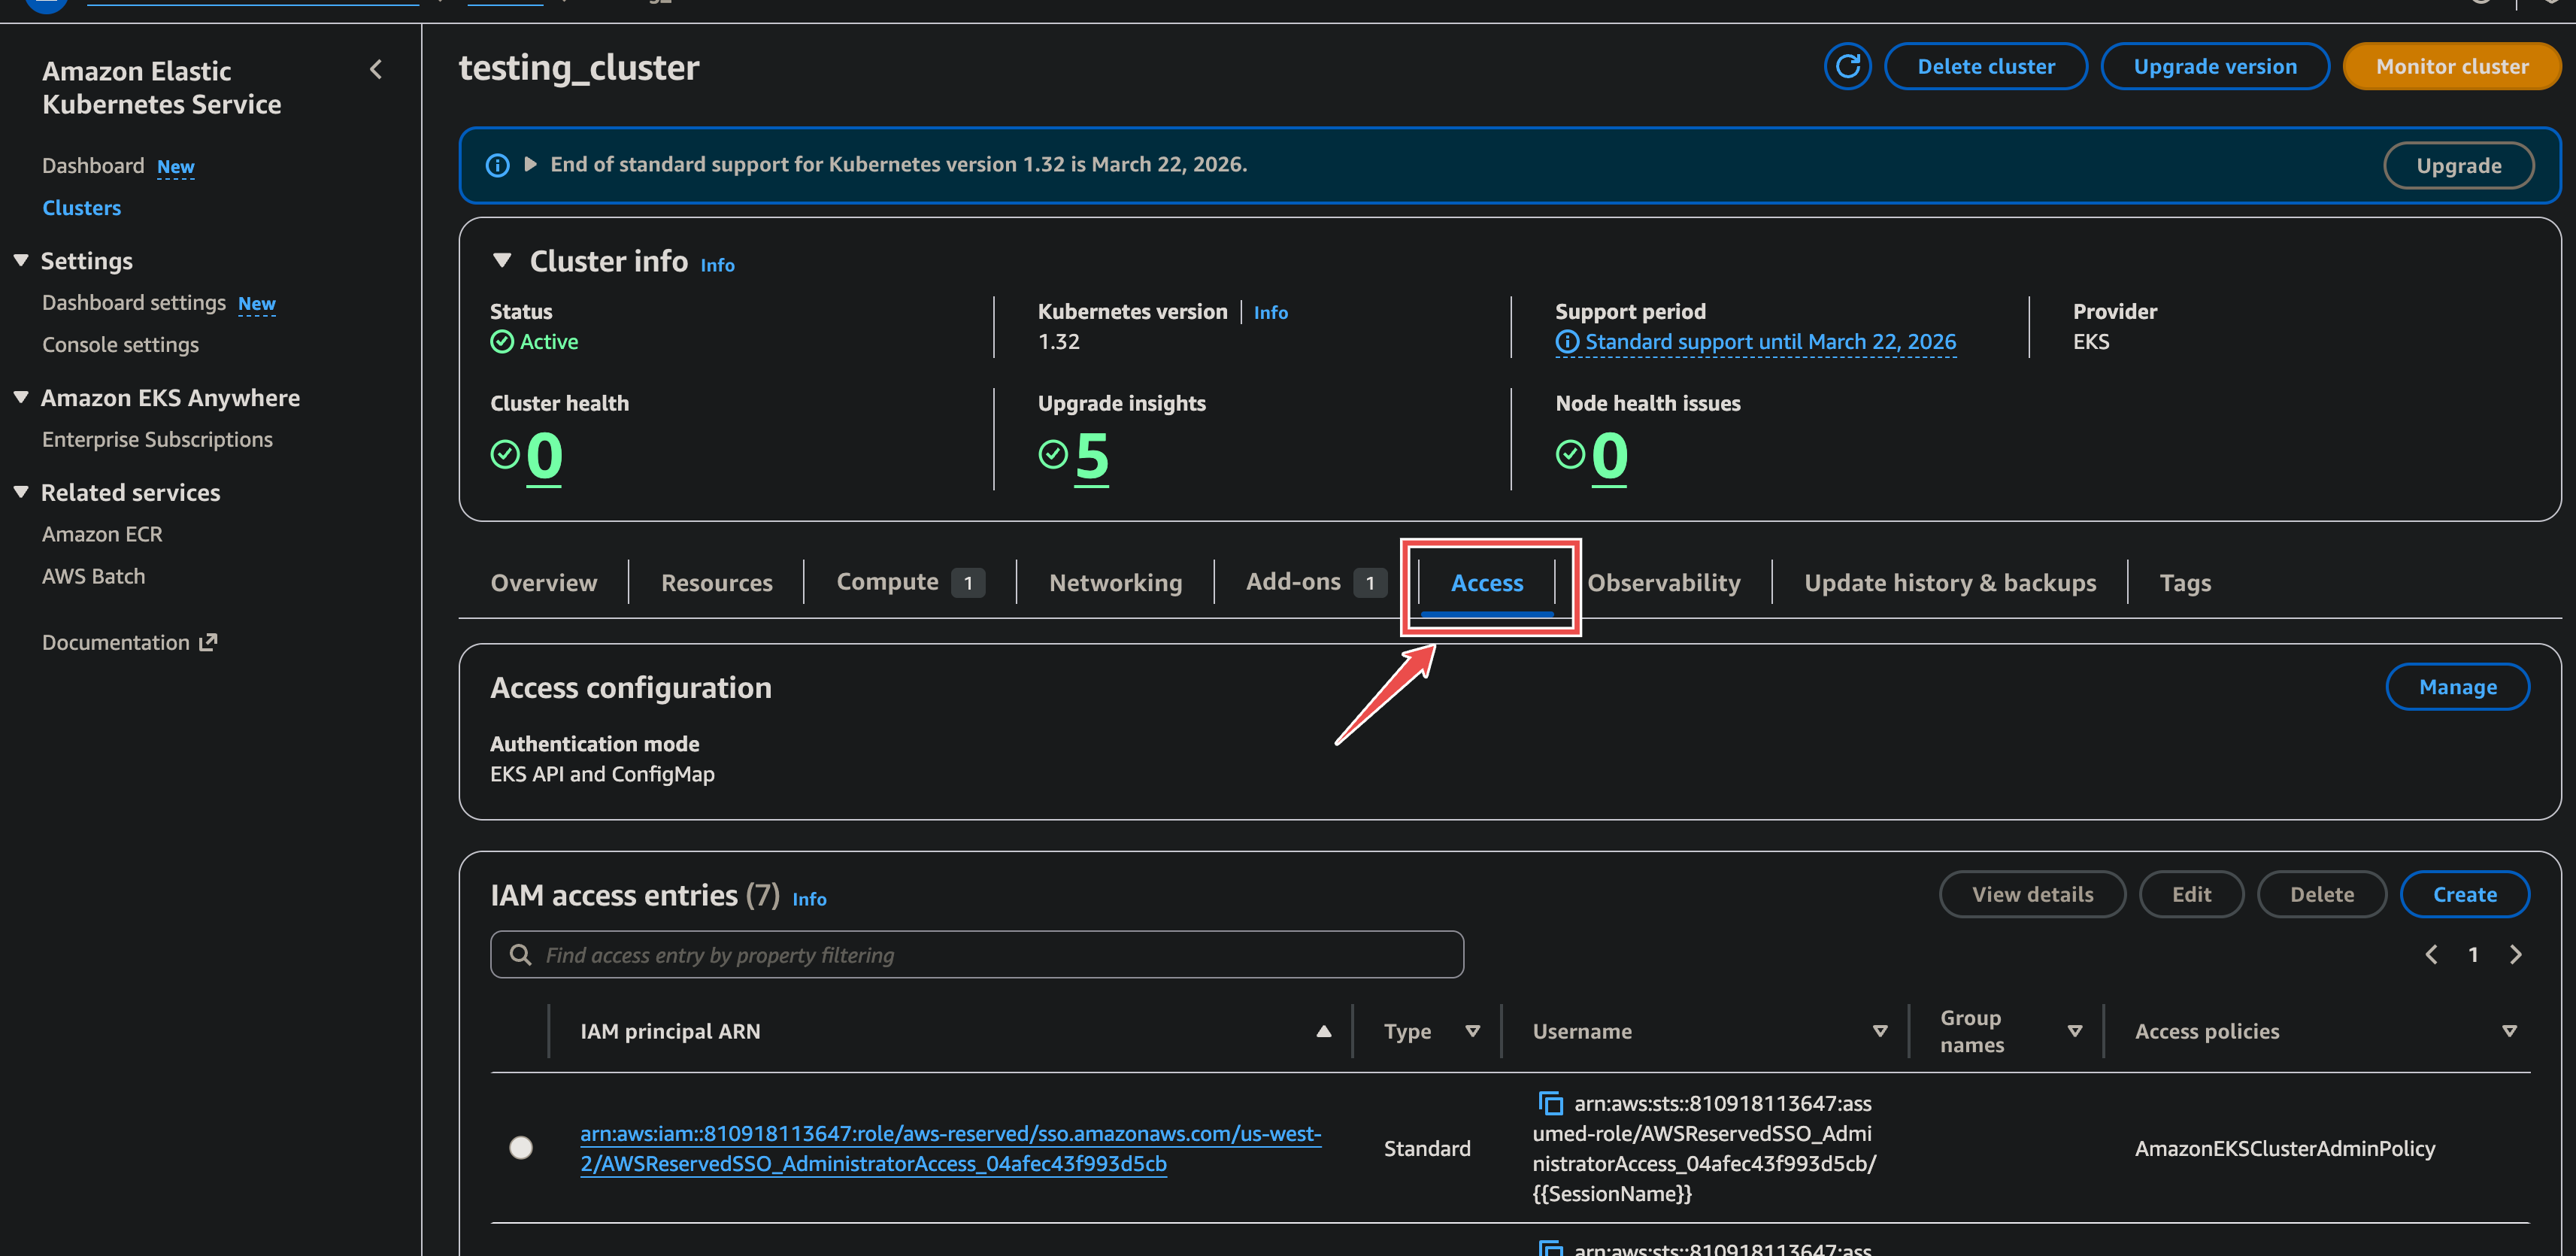
Go to Amazon EKS > select your cluster > Access tab. In IAM access entries, click Manage.
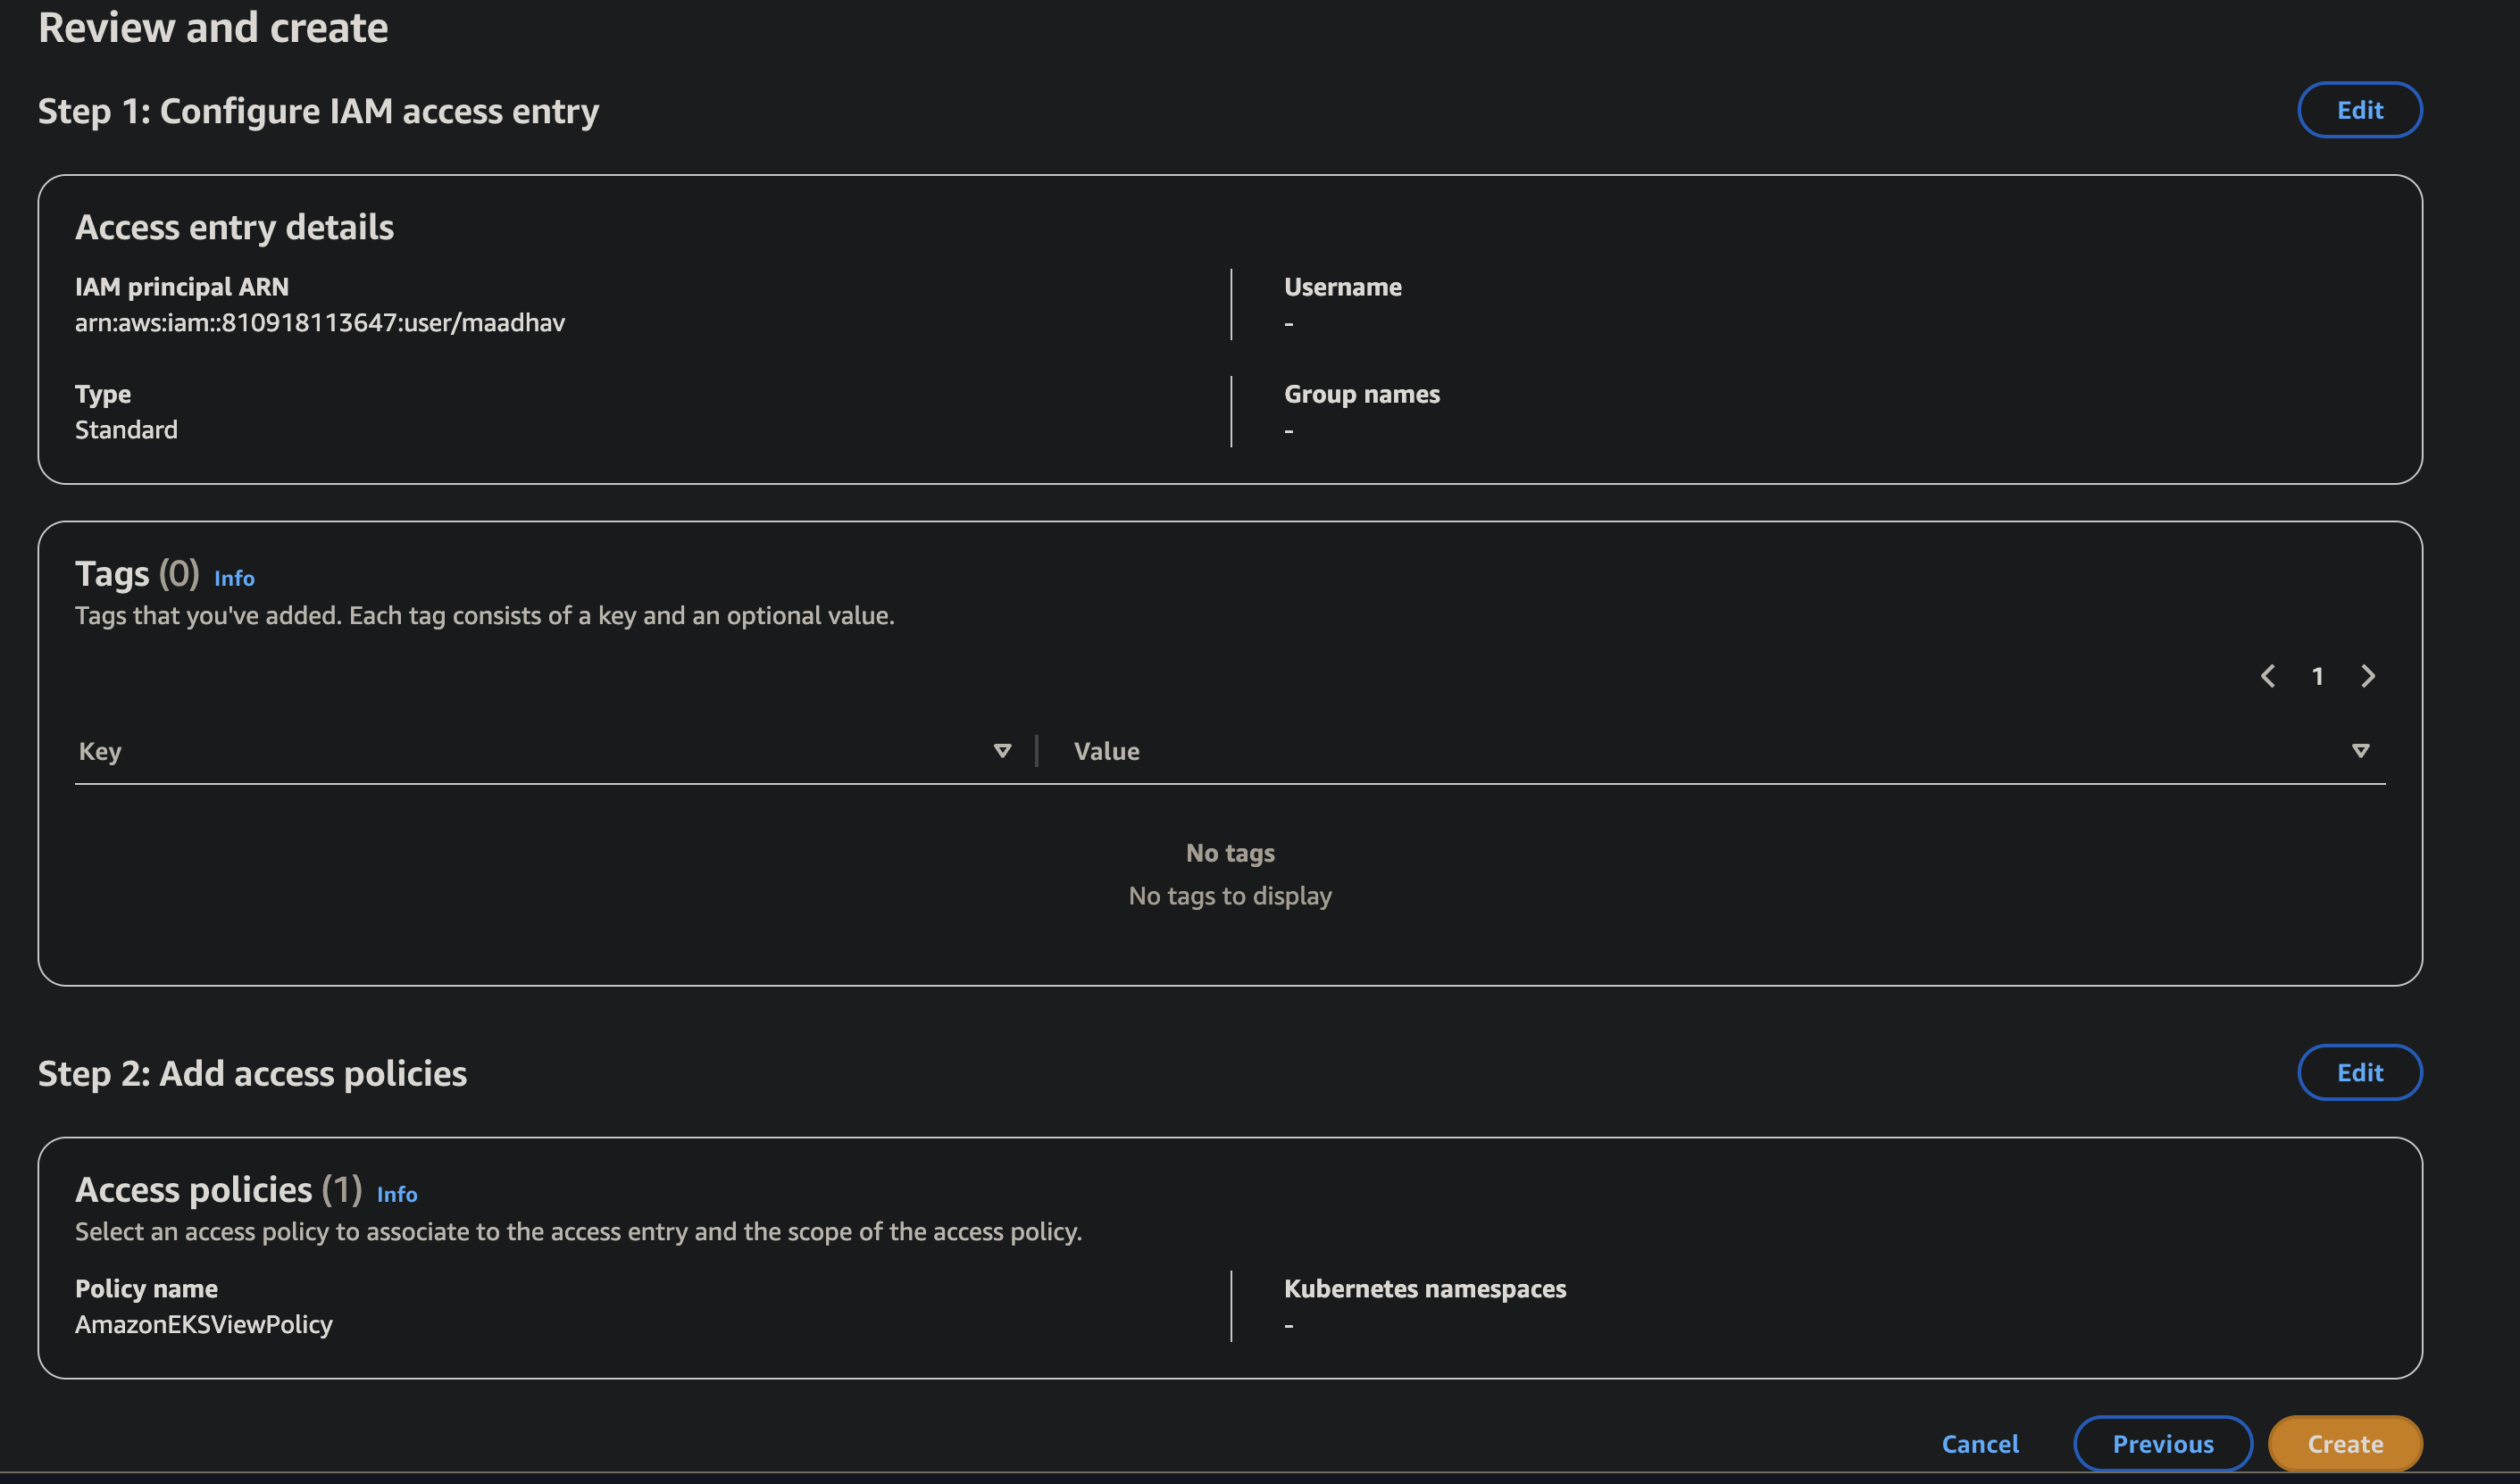
-
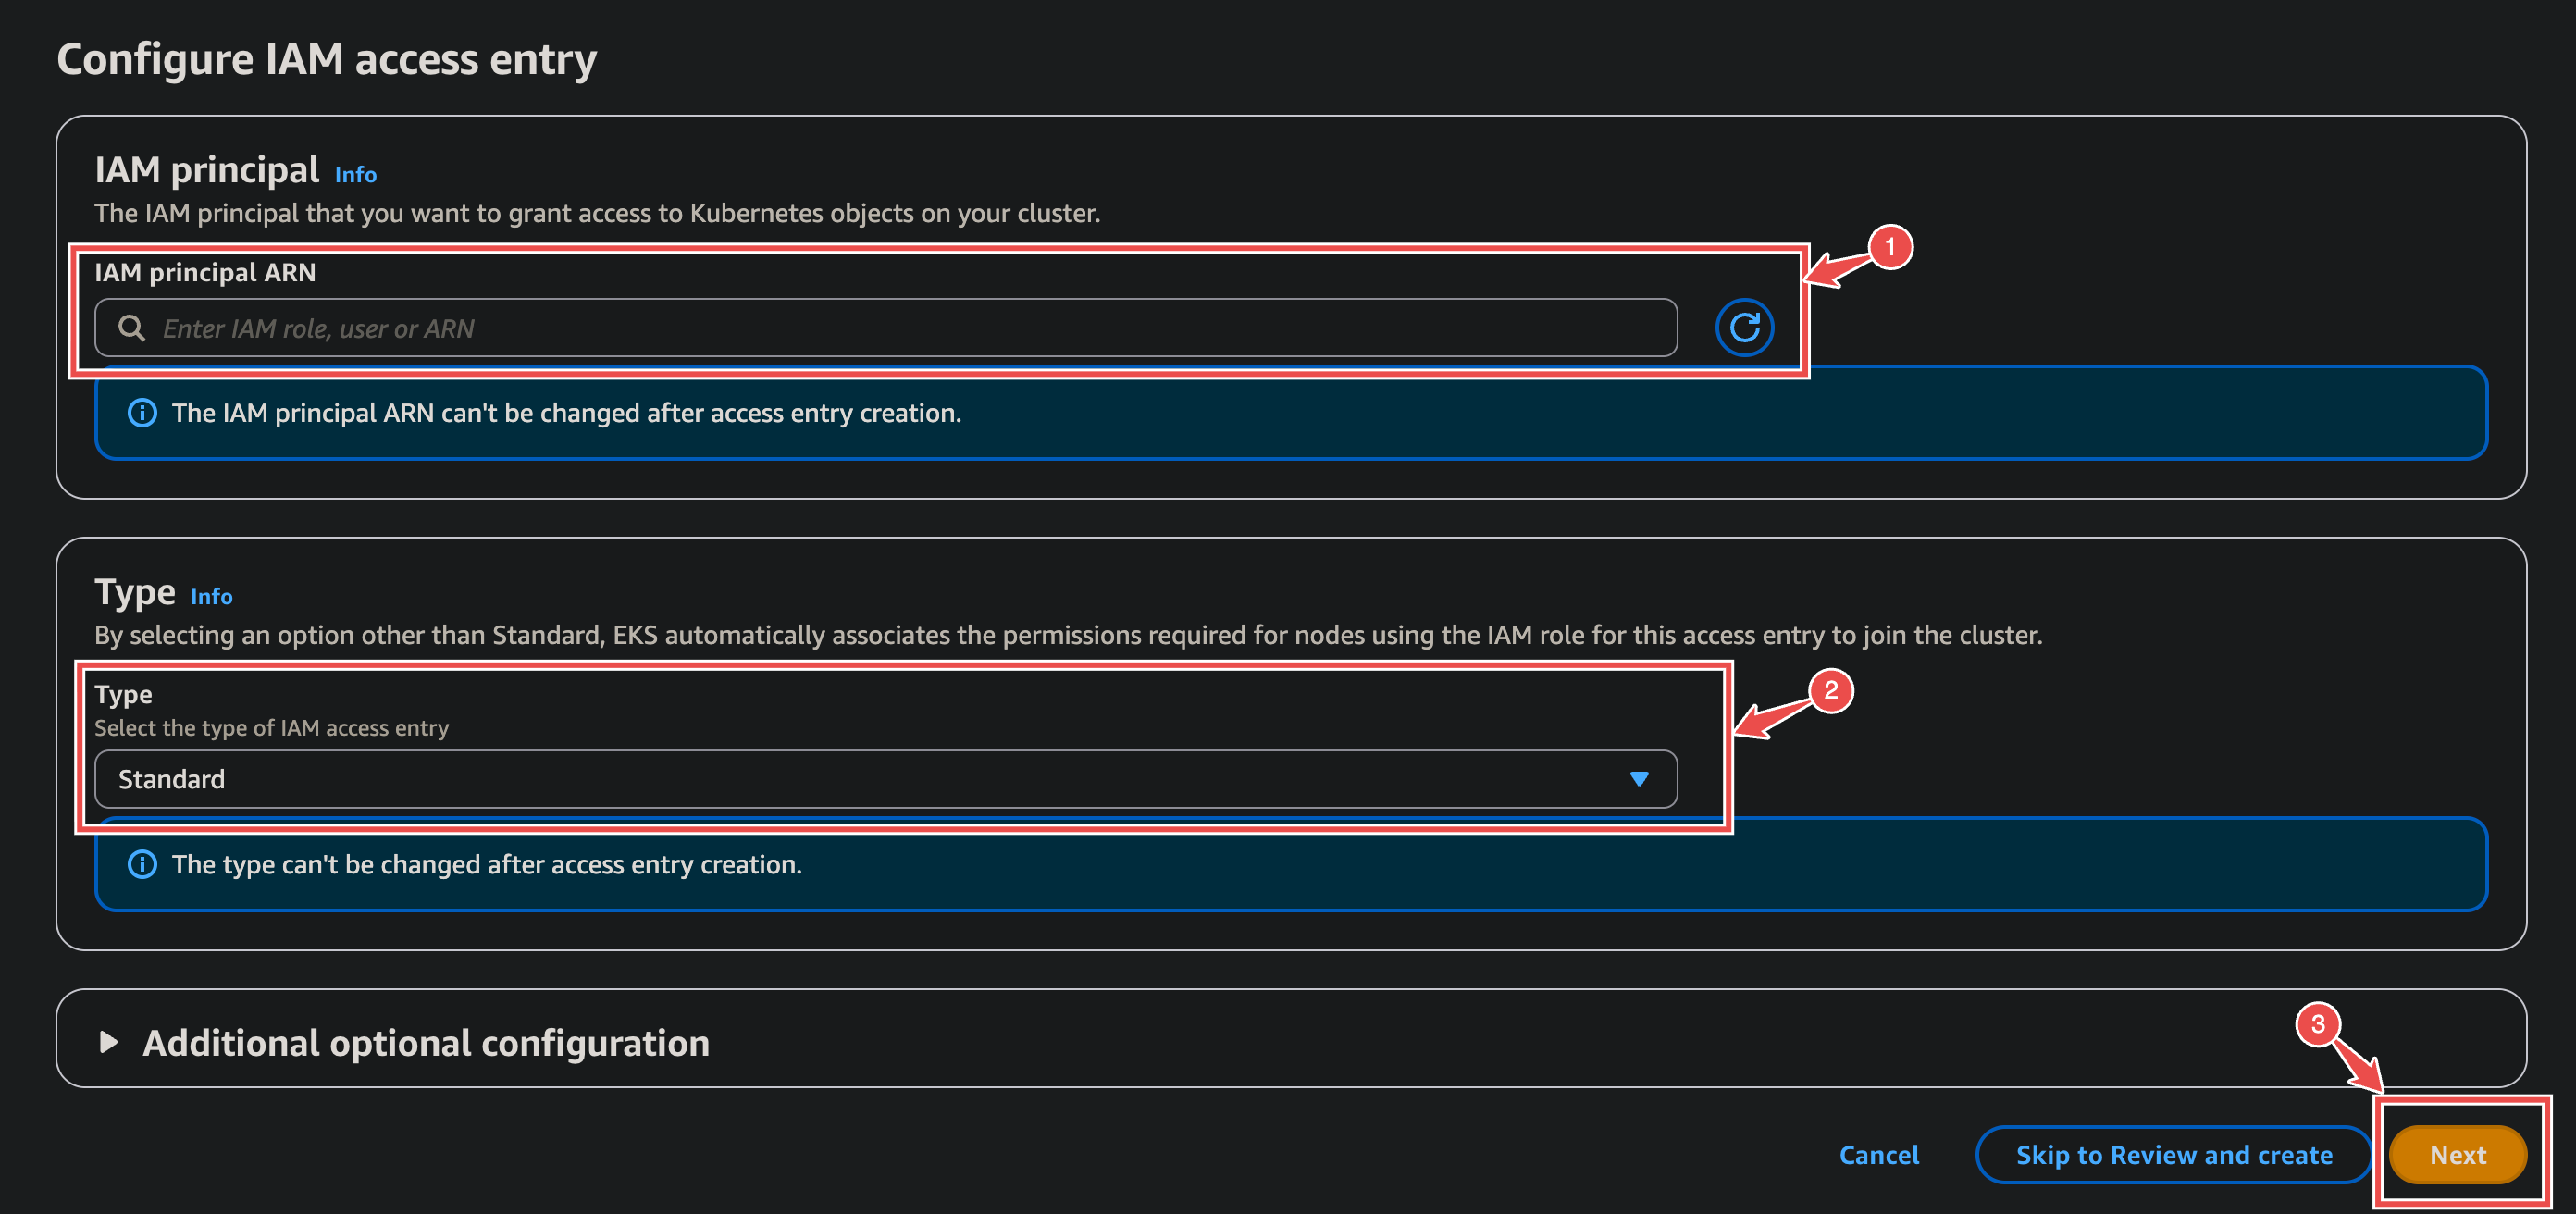
Create access entry: Enter the NeuBird role ARN as the IAM principal, type Standard, click Next.
-
Add access policy: Select AmazonEKSViewPolicy (minimum required) with Cluster scope.
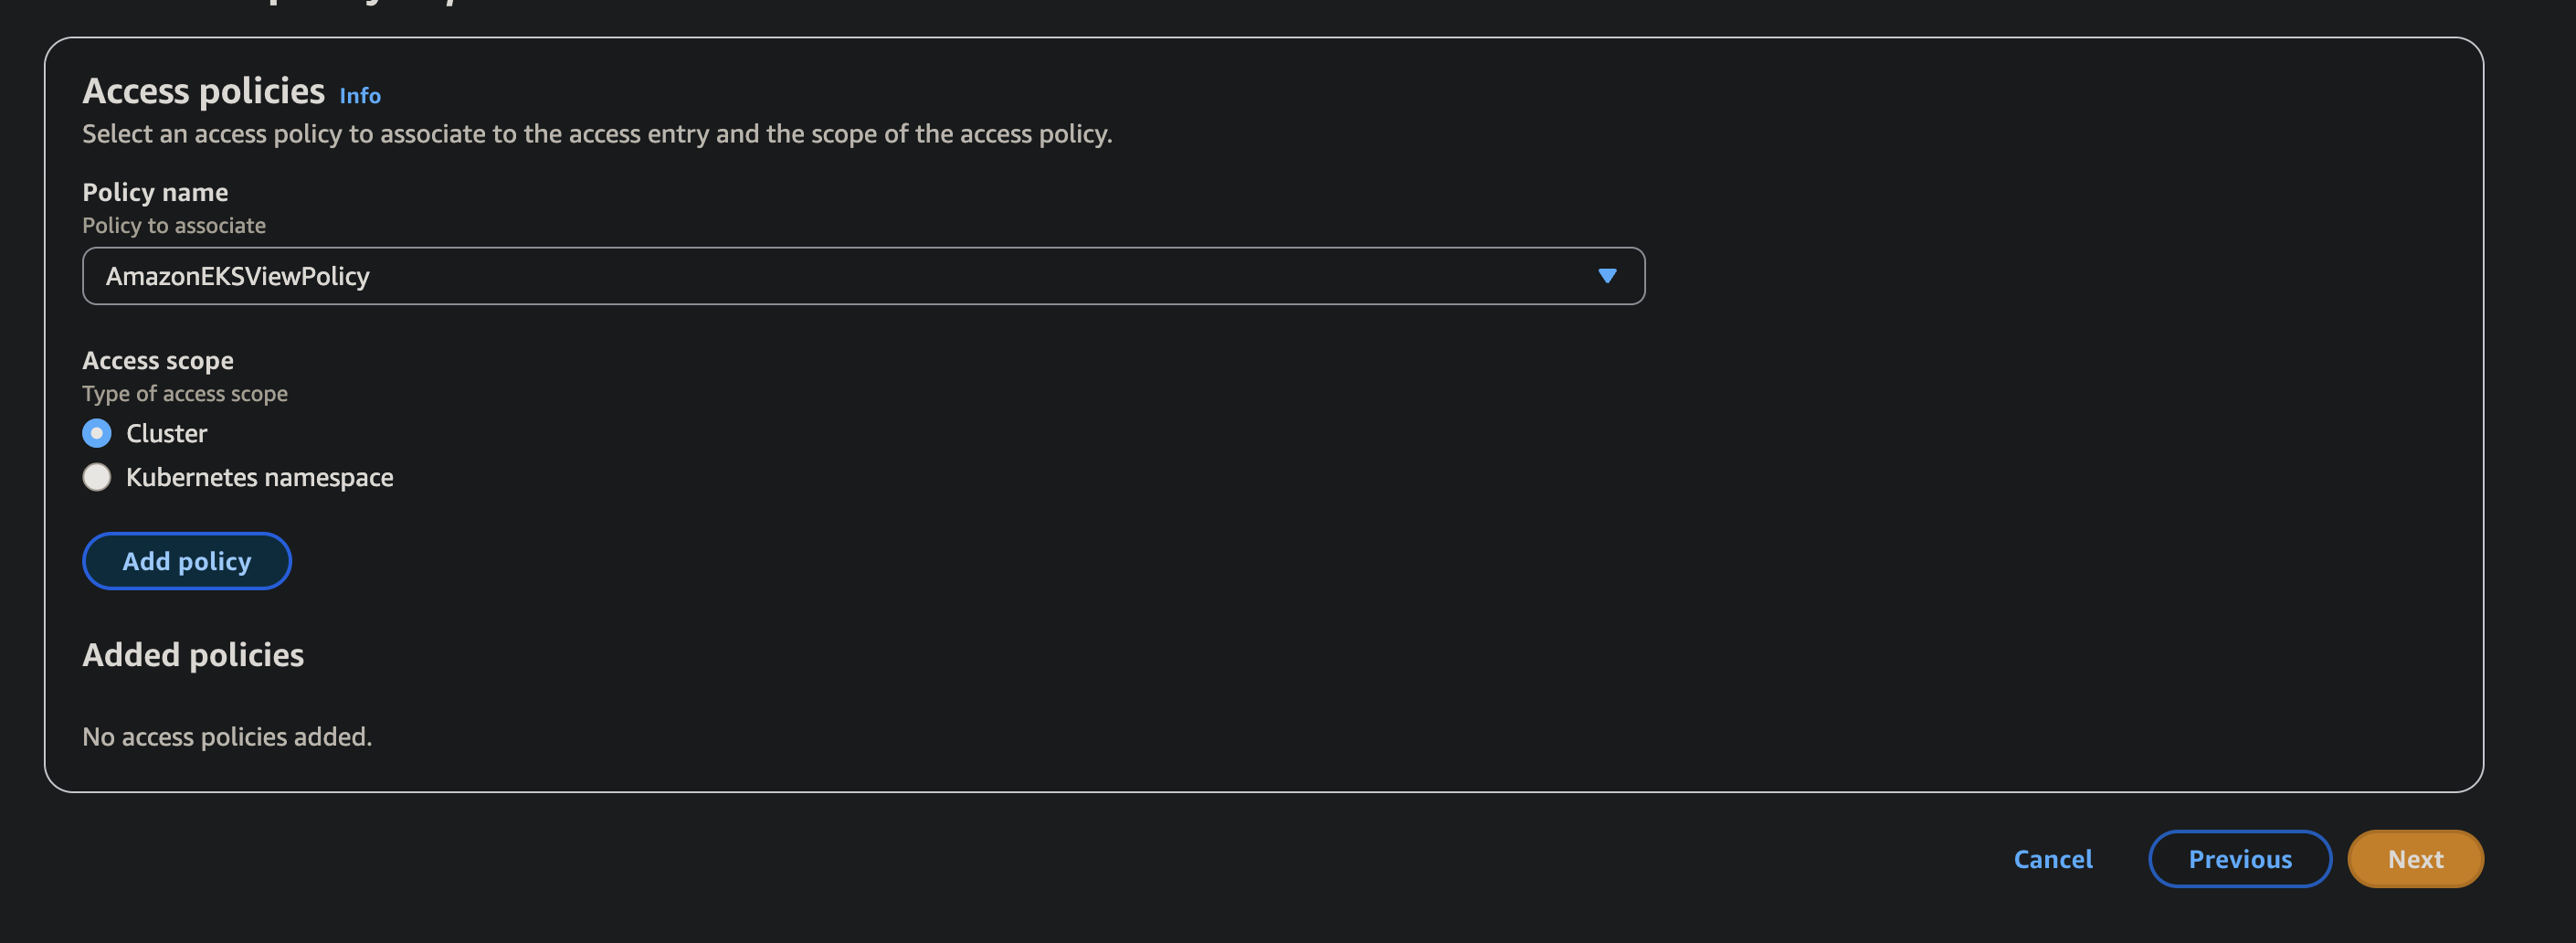
-
Review and create.
Network Access
Section titled “Network Access”If your EKS cluster endpoint has CIDR restrictions (not 0.0.0.0/0), add NeuBird’s IP:
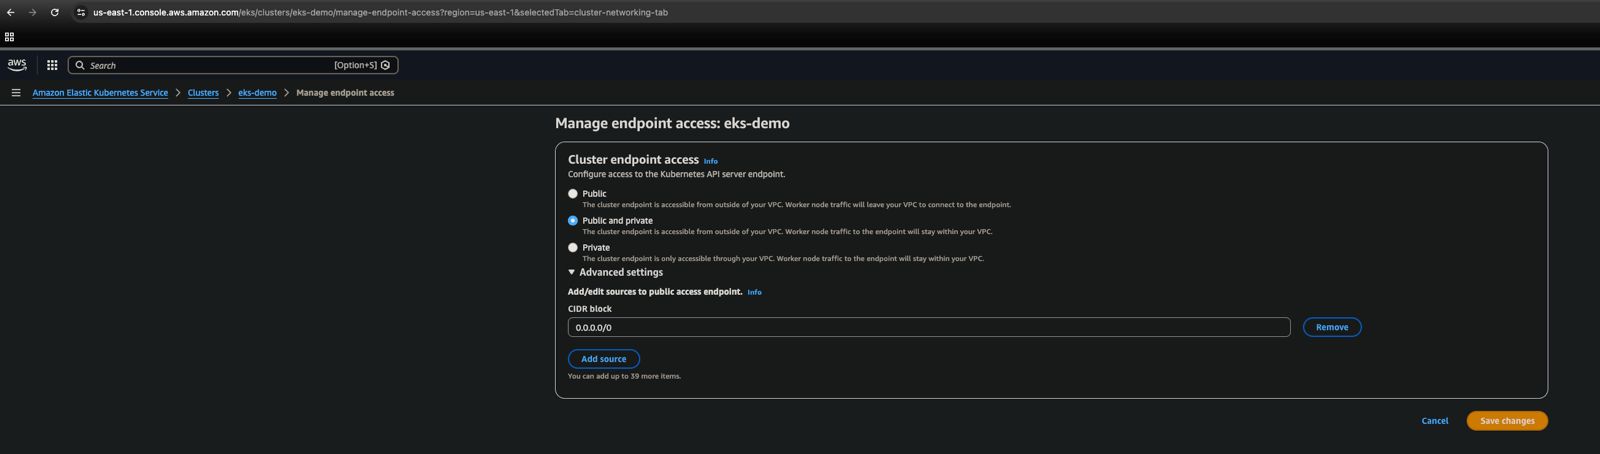
Add the following CIDR block:
54.236.215.157/32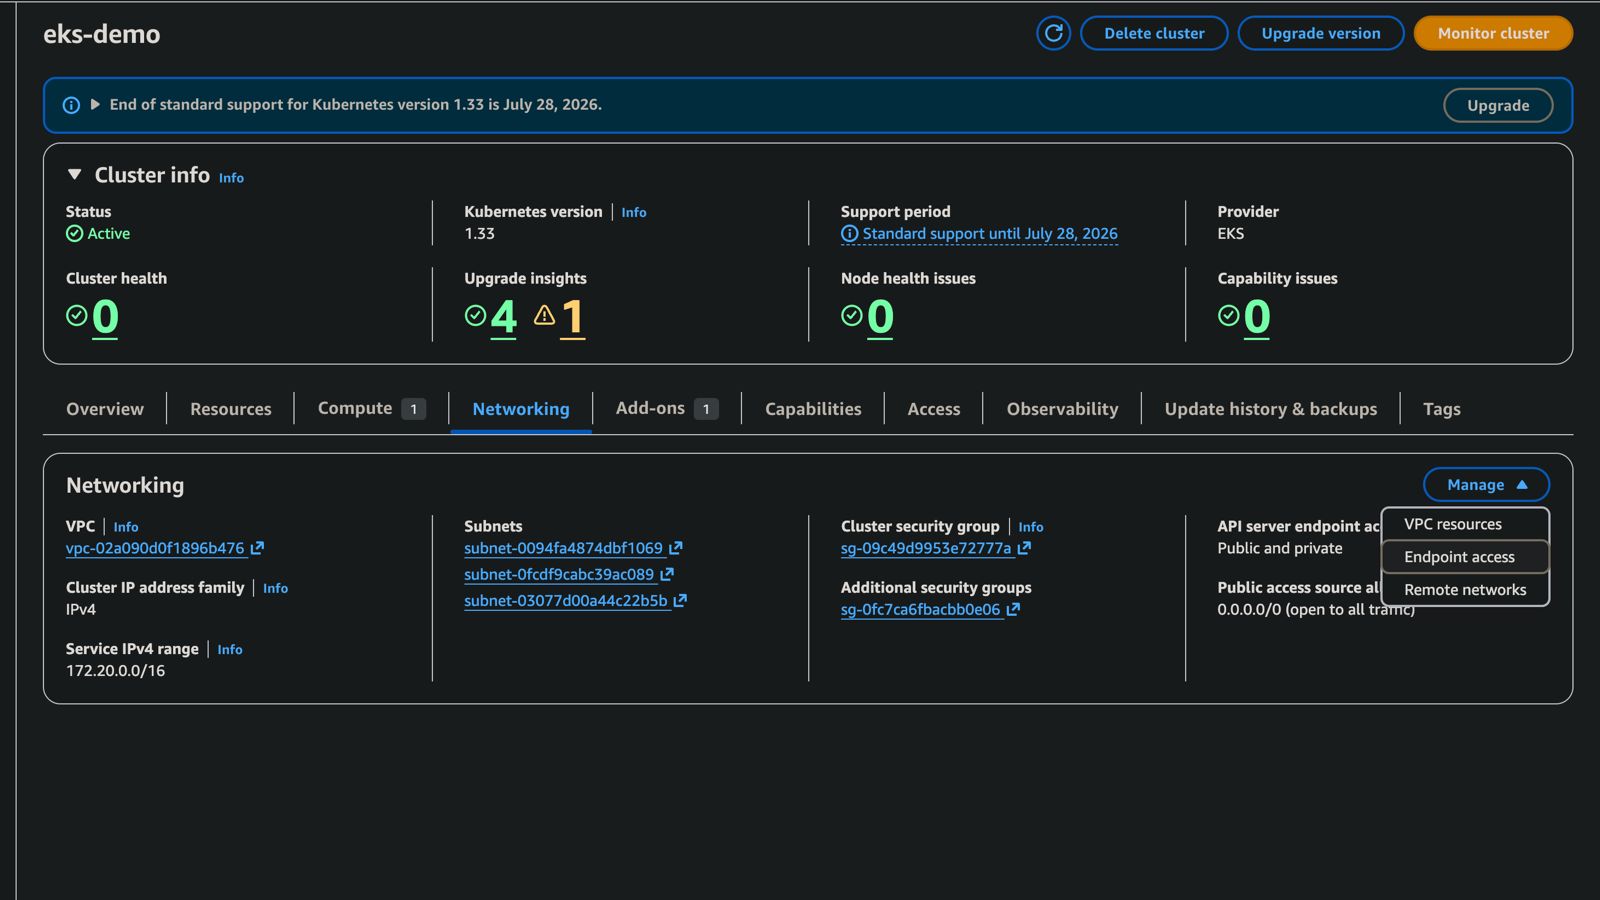
Or via CLI:
aws eks update-cluster-config --resources-vpc-config endpointPublicAccess=true,publicAccessCidrs=<your-existing-cidrs>,54.236.215.157/32Step 3: Enable Configuration Change Telemetry
Section titled “Step 3: Enable Configuration Change Telemetry”Skip this step if you already have CloudTrail delivering to a CloudWatch Log Group.
NeuBird uses CloudTrail to monitor configuration changes across your AWS resources.
Create a CloudWatch Log Group
Section titled “Create a CloudWatch Log Group”-
Navigate to CloudWatch in the AWS Console.
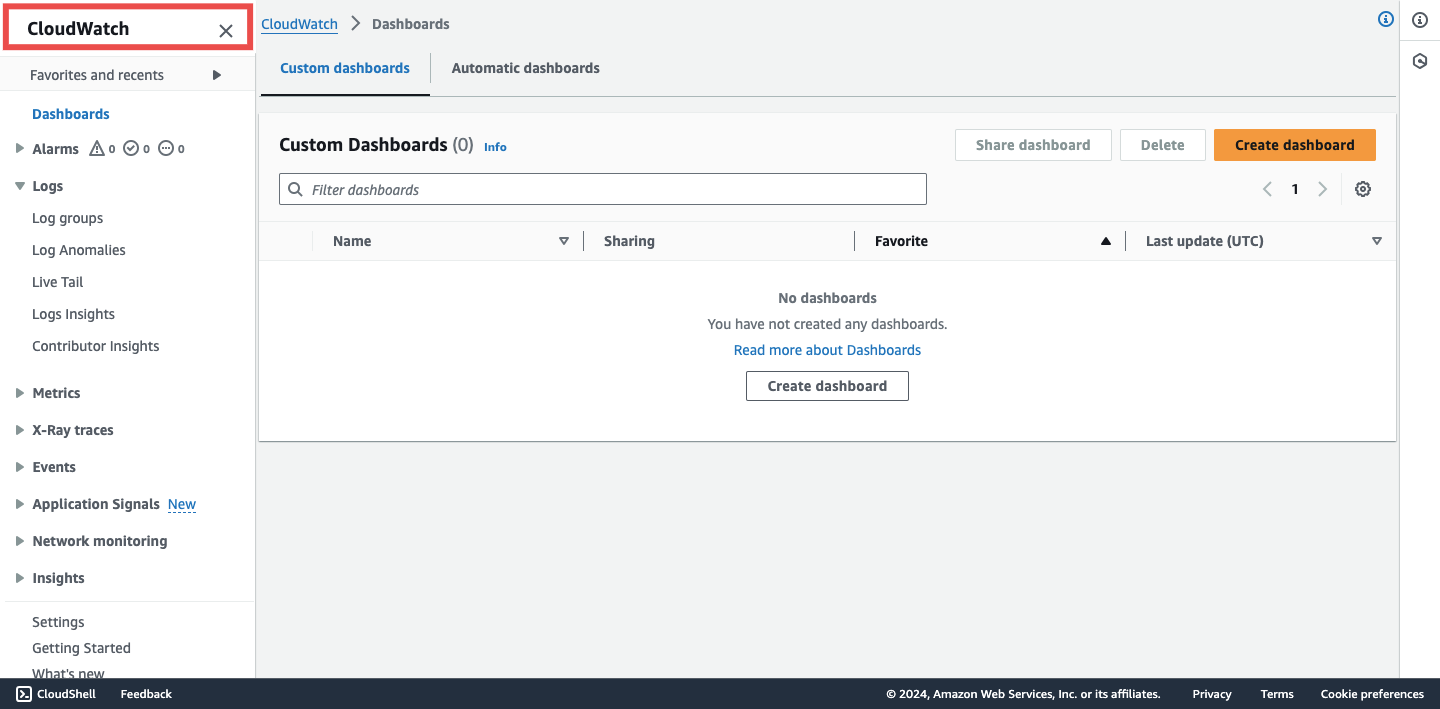
-
Go to Logs > Log groups > Create log group.
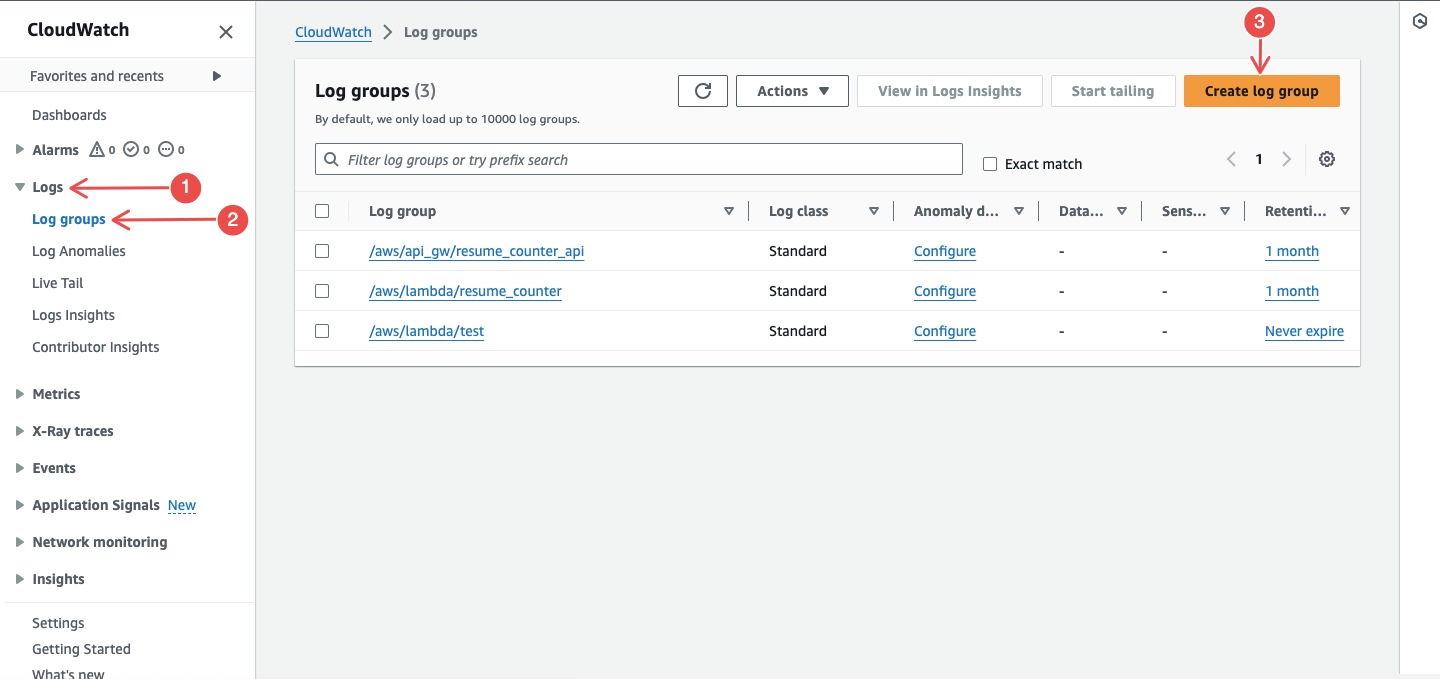
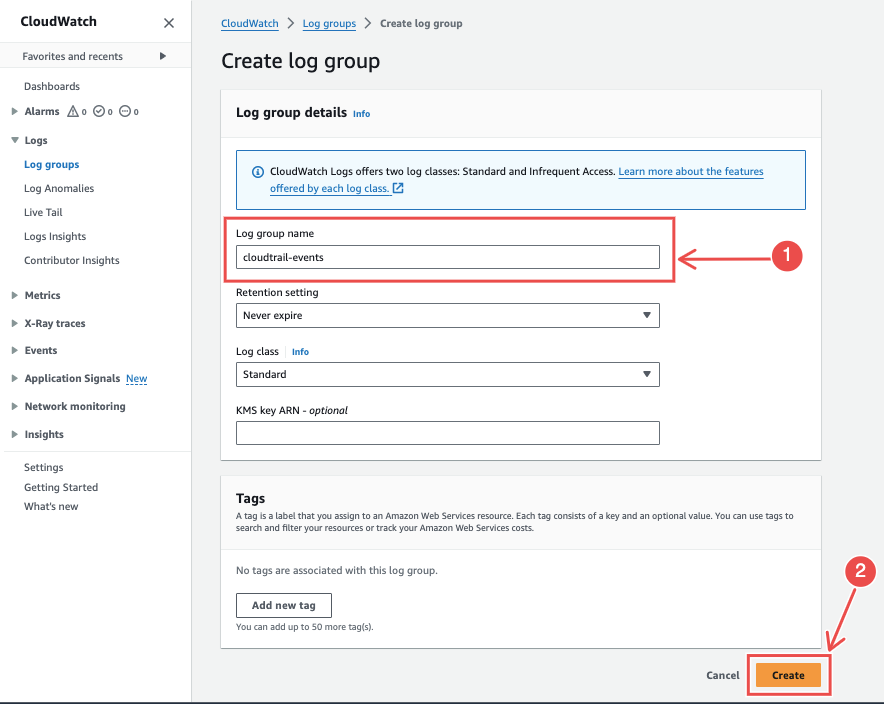
-
Enter a log group name and click Create.
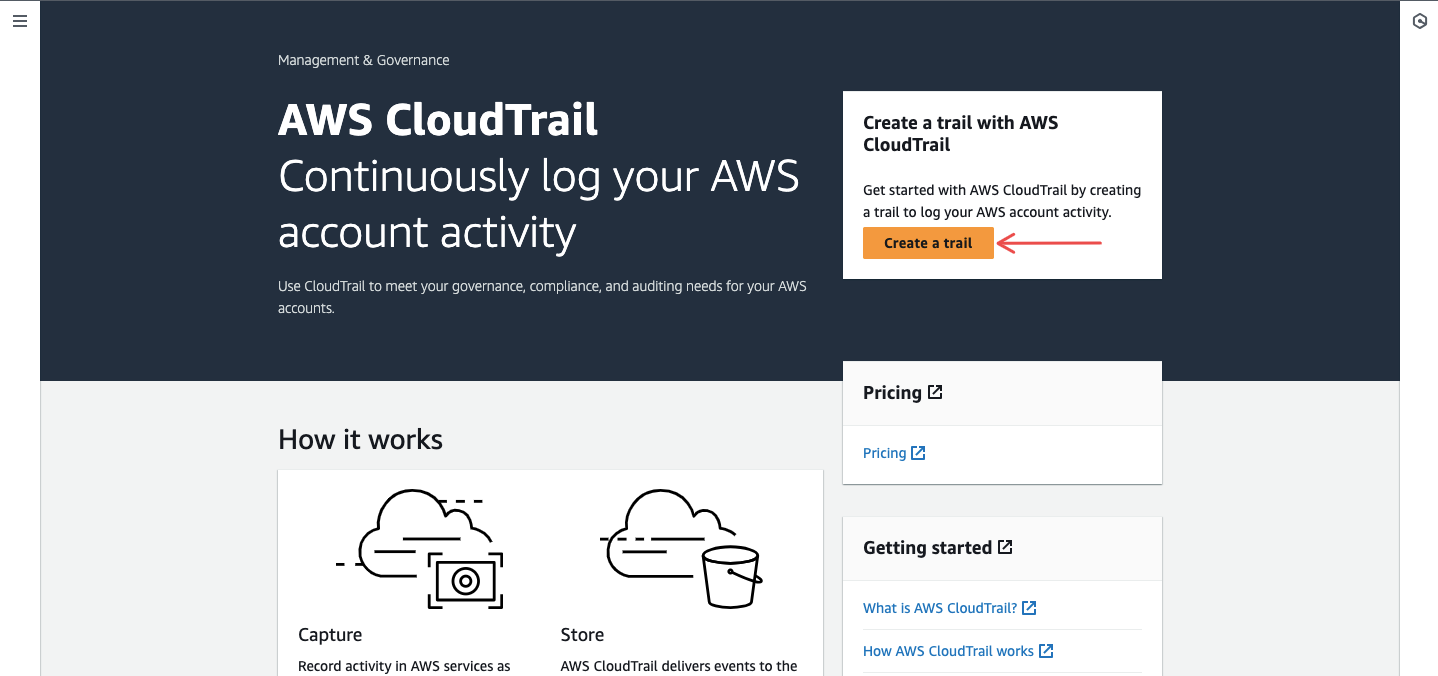
Create a CloudTrail Trail
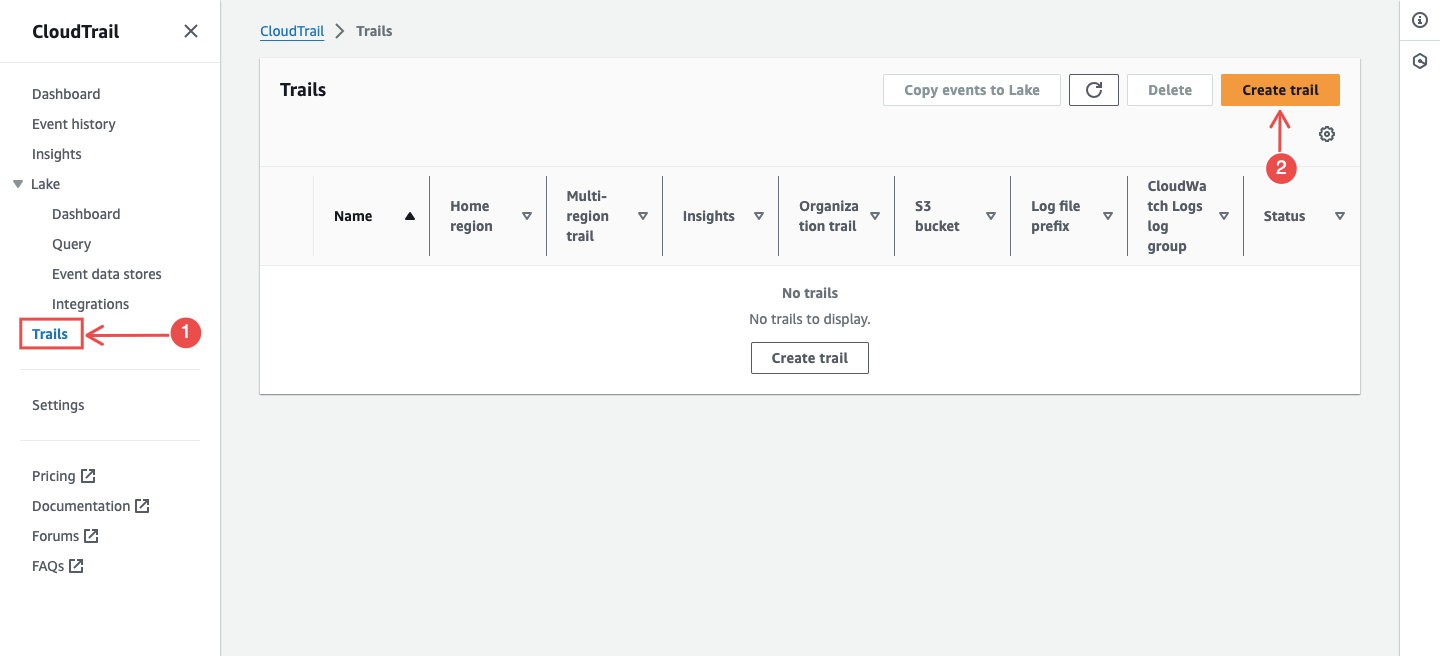
Section titled “Create a CloudTrail Trail”-
Navigate to CloudTrail and click Create trail.
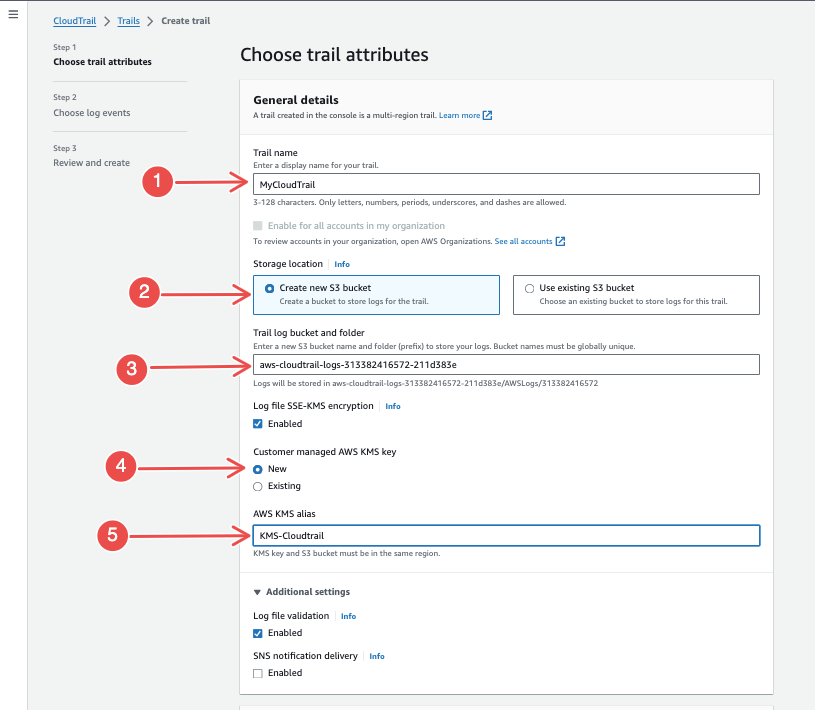
-
Enter a trail name and create a new S3 bucket for storage.
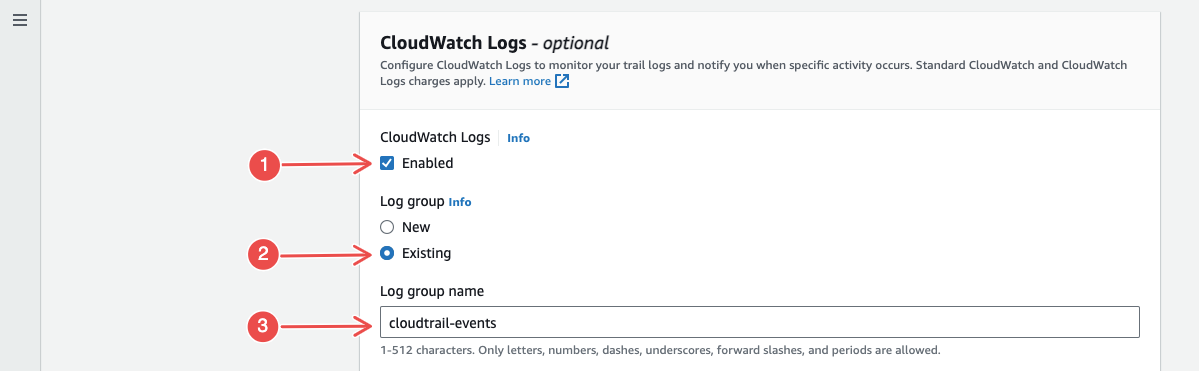
-
Enable CloudWatch Logs and select the log group you created.
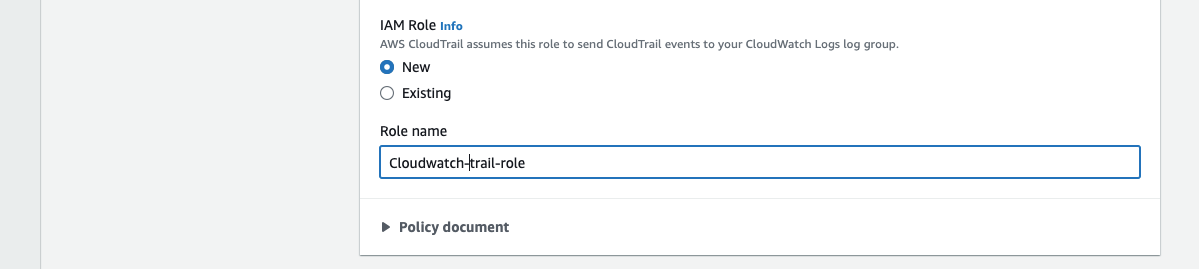
-
For IAM Role, choose New or select an existing role. Click Next.
-
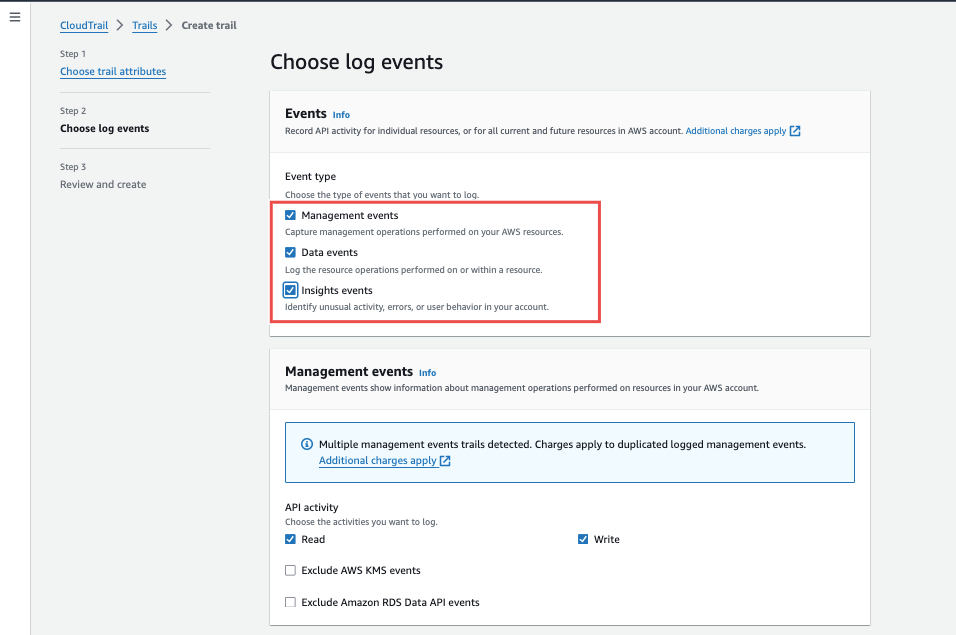
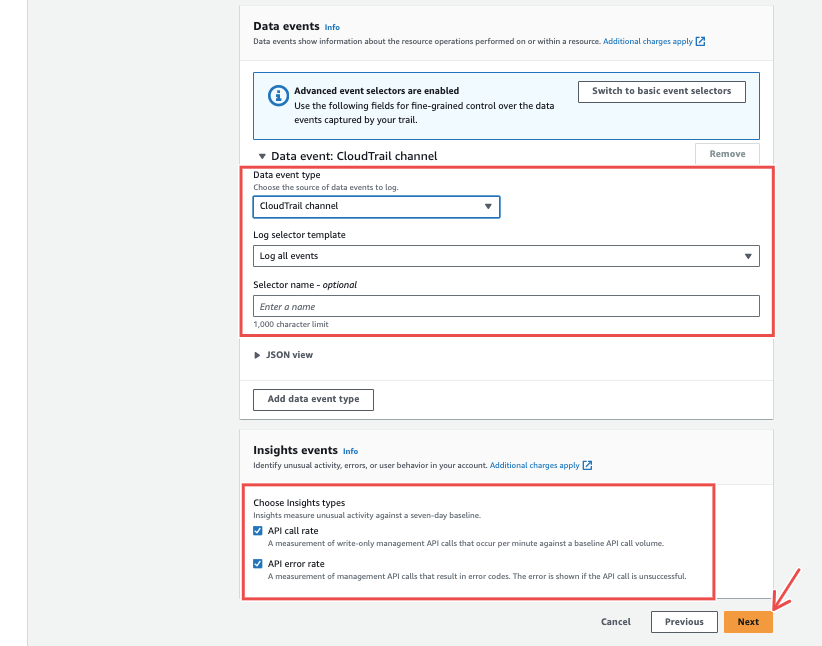
Select all event types and proceed.
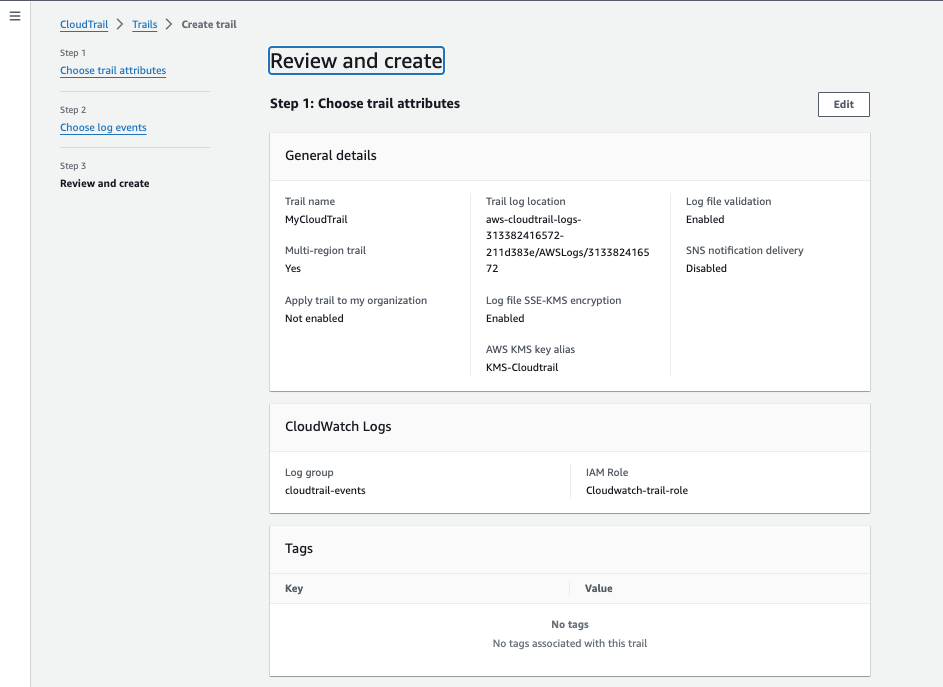
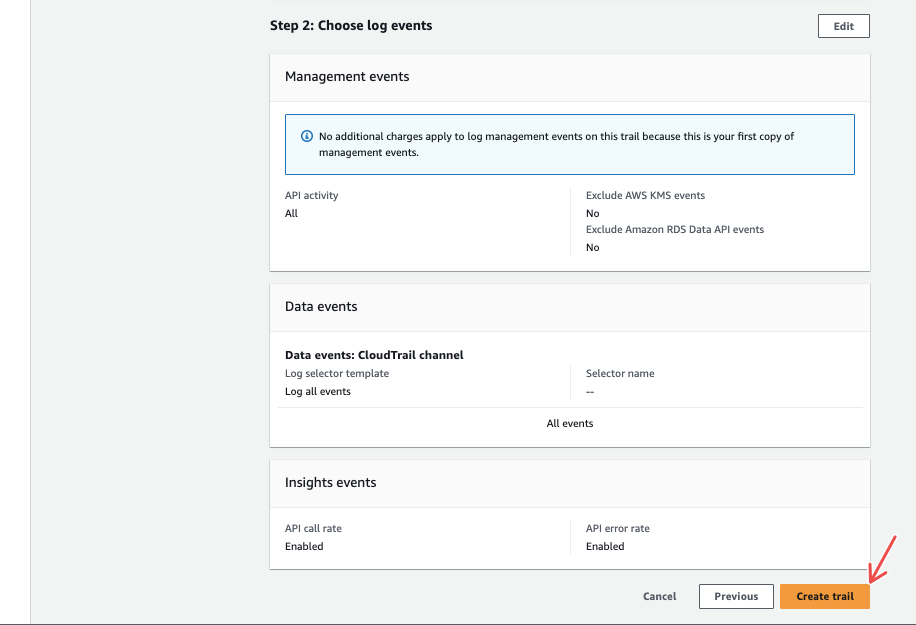
-
Review and click Create trail.
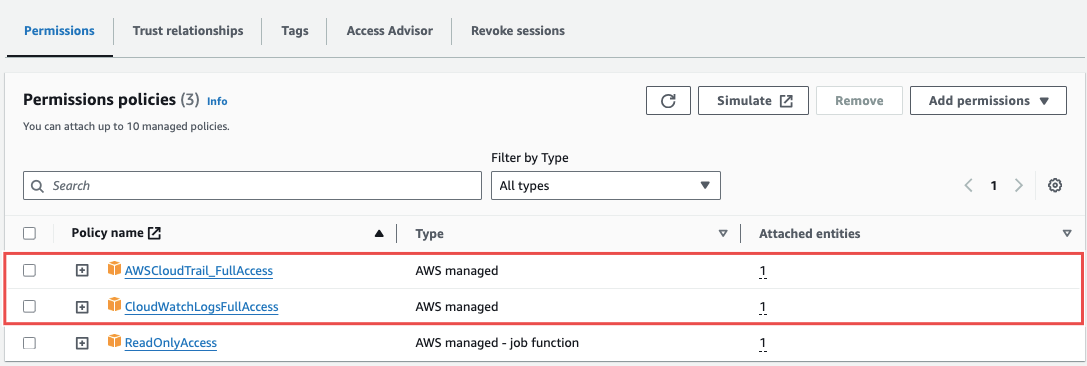
Configure Permissions
Section titled “Configure Permissions”In IAM, find the role attached to your CloudTrail and attach these policies:
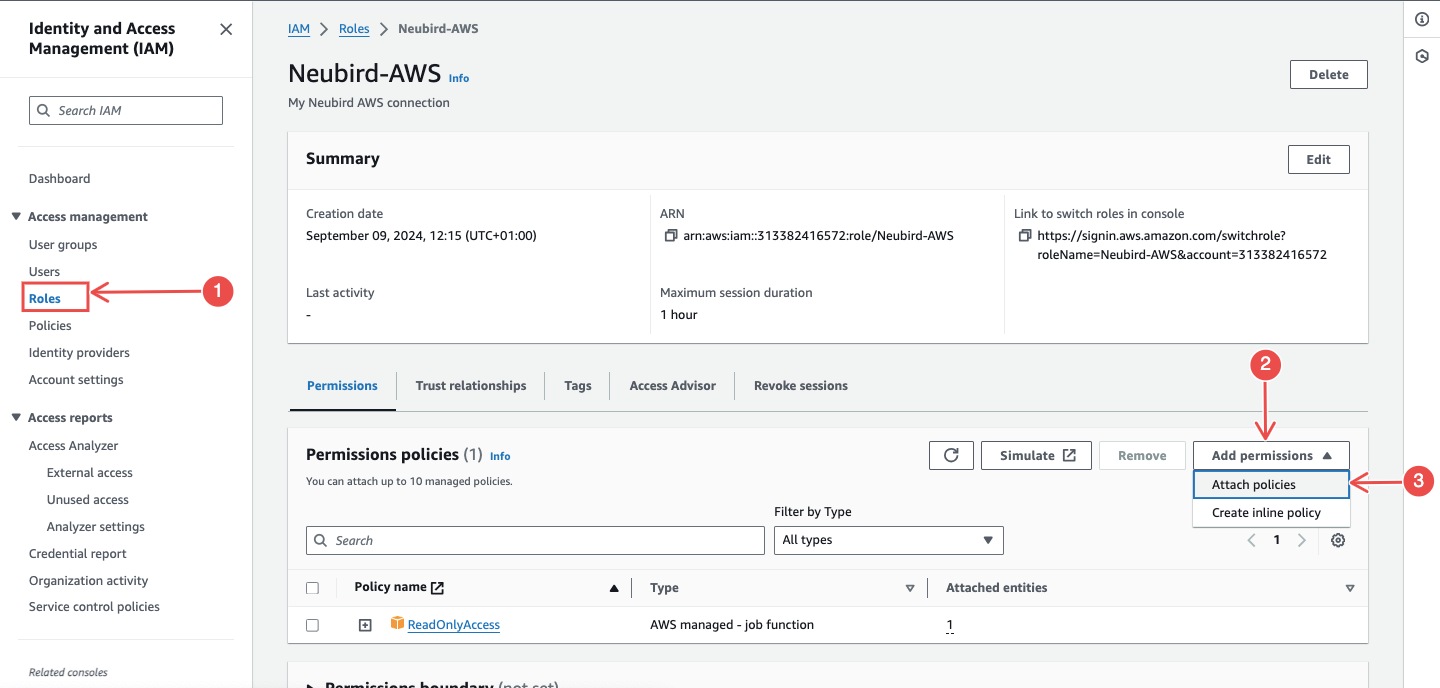
- AWSCloudTrail_FullAccess
- CloudWatchLogsFullAccess
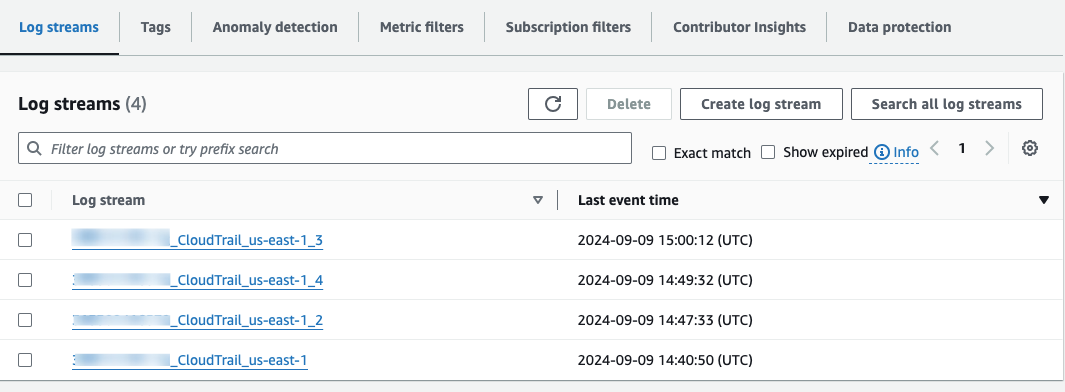
Verify Log Delivery
Section titled “Verify Log Delivery”Check your CloudWatch log group to confirm logs from CloudTrail are being delivered.
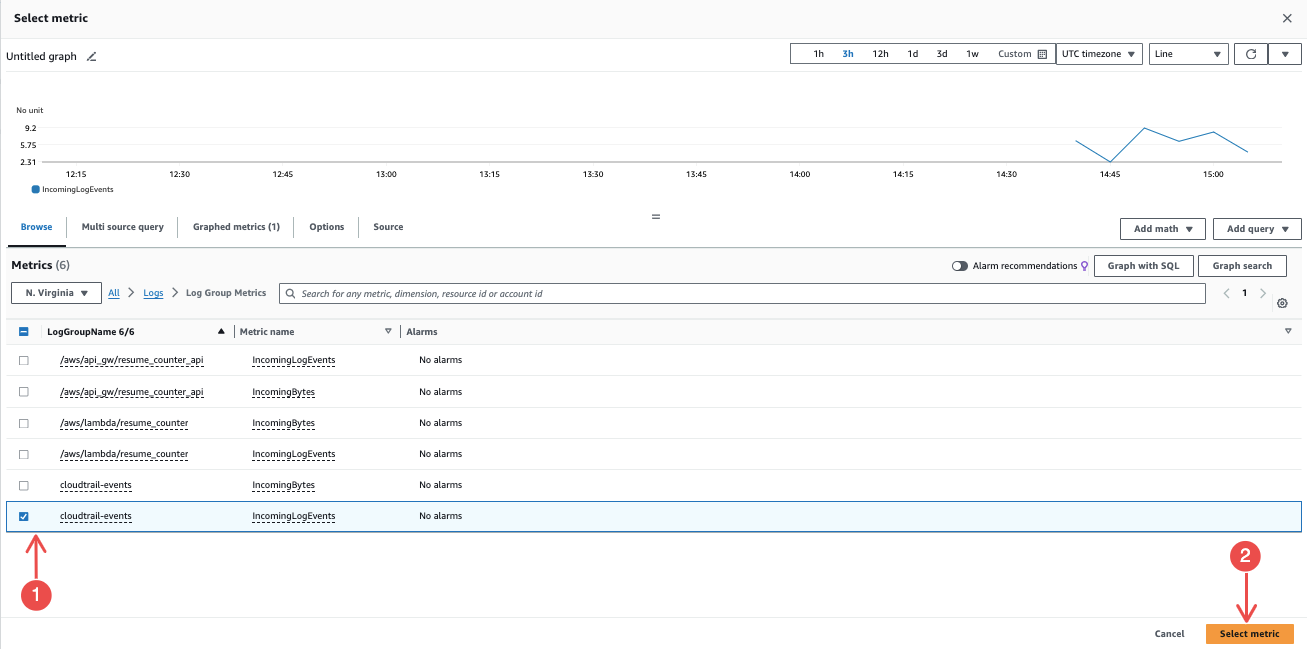
CloudWatch Alarms (Optional)
Section titled “CloudWatch Alarms (Optional)”In CloudWatch, go to Alarms > Create alarm and choose metrics related to CloudTrail logs.

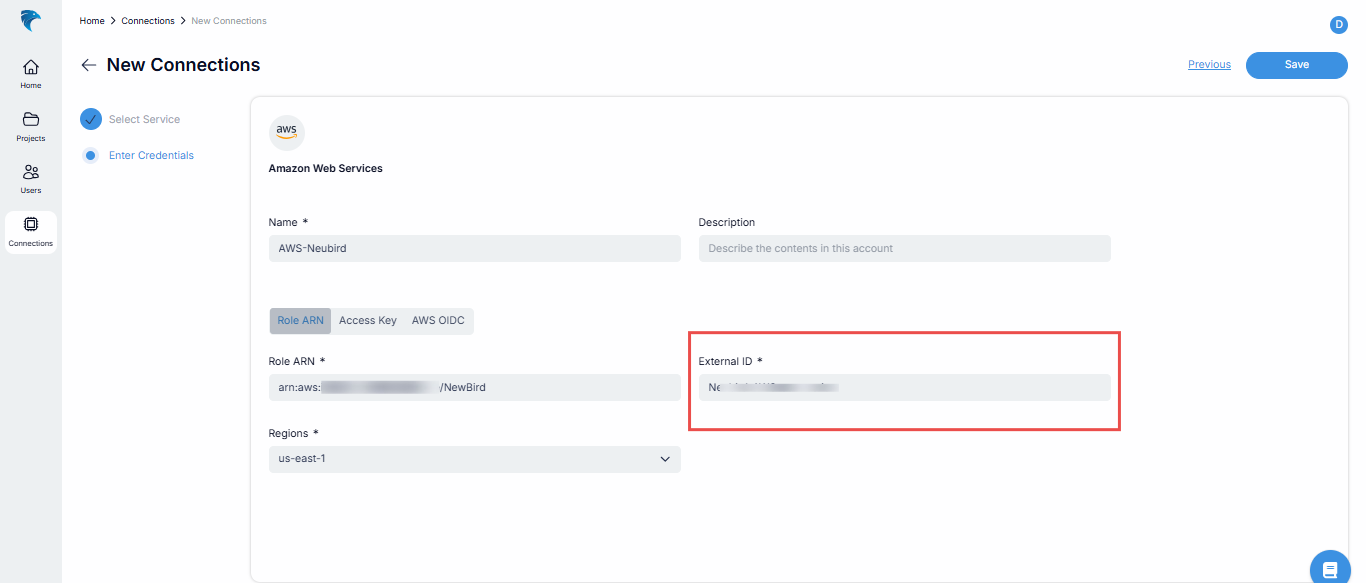
Connection Fields
Section titled “Connection Fields”NeuBird supports three authentication methods:
Role ARN (recommended)
Section titled “Role ARN (recommended)”| Field | Required | Description |
|---|---|---|
| Name | Yes | A descriptive name for this connection |
| Description | No | Optional note about what this connection is for |
| Role ARN | Yes | The ARN of the IAM role created in Step 1 |
| Regions | Yes | AWS regions to collect telemetry from |
Access Key
Section titled “Access Key”| Field | Required | Description |
|---|---|---|
| Name | Yes | A descriptive name for this connection |
| Description | No | Optional note about what this connection is for |
| Access Key ID | Yes | IAM user access key ID |
| Access Key Secret | Yes | IAM user secret access key |
| Regions | Yes | AWS regions to collect telemetry from |
AWS OIDC
Section titled “AWS OIDC”| Field | Required | Description |
|---|---|---|
| Name | Yes | A descriptive name for this connection |
| Description | No | Optional note about what this connection is for |
| Regions | Yes | AWS regions to collect telemetry from |
The OIDC method redirects you to authenticate directly with your AWS account.
For general instructions on creating and managing connections, see the Connections Overview.