

Dynatrace
Connecting to Dynatrace allows NeuBird to collect telemetry data such as service performance, environment metrics, and application health for real-time monitoring and insights.
The credentials NeuBird requires depend on your Dynatrace deployment type:
- Dynatrace SaaS — both a Classic API Token and an OAuth Client (Client ID and Client Secret) are required. Each token serves a different purpose and must be configured correctly to enable secure communication between NeuBird and Dynatrace.
- Dynatrace Managed (on-prem) — only the Classic API Token is required. OAuth clients cannot be created on Managed deployments, so the OAuth steps below do not apply.
Note: Dynatrace Managed limitations
Grail-backed capabilities (logs, spans, business events, and other Grail data sources) are unavailable on Dynatrace Managed because Grail is a SaaS-only service. NeuBird features that depend on these data sources will not work against a Managed environment.
Create a Classic API Token
Section titled “Create a Classic API Token”To allow NeuBird to access Dynatrace APIs, create a Classic API Token with the required scopes.
Navigate to Access Tokens
Section titled “Navigate to Access Tokens”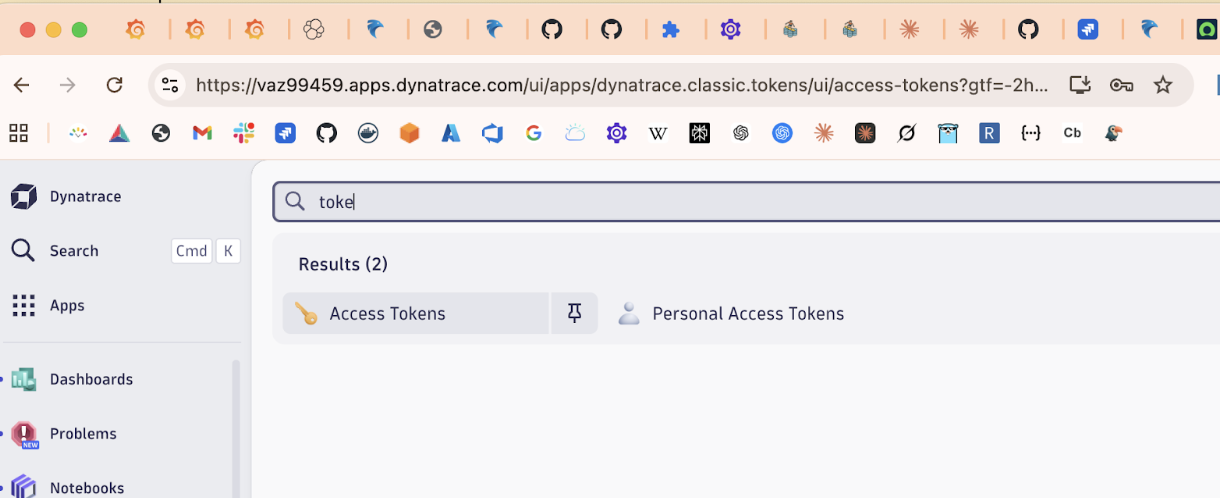
- Log in to your Dynatrace environment.
- In the top search bar, type Access Tokens.
- Select Access Tokens from the results.
- Click Create new token.
Configure Token Scopes
Section titled “Configure Token Scopes”Enable the following scopes:
problems.readproblems.writesettings.readmetrics.readentities.read
Provide a descriptive name for the token, for example: NeuBird.
After creating the token, copy and store it securely. You will not be able to view it again.
Create Token Using API (Optional)
Section titled “Create Token Using API (Optional)”You can also create the Classic API Token using the Dynatrace API. Use the URL form that matches your deployment type:
Dynatrace SaaS:
curl -X POST "https://<your-environment-id>.live.dynatrace.com/api/v2/apiTokens" \ -H "accept: application/json; charset=utf-8" \ -H "Content-Type: application/json; charset=utf-8" \ -H "Authorization: Api-Token <YOUR_EXISTING_API_TOKEN>" \ -d '{ "name": "NeuBird", "scopes": [ "entities.read", "metrics.read", "problems.read", "problems.write", "settings.read" ] }'Dynatrace Managed (on-prem):
curl -X POST "https://<managed-host>/e/<environment-id>/api/v2/apiTokens" \ -H "accept: application/json; charset=utf-8" \ -H "Content-Type: application/json; charset=utf-8" \ -H "Authorization: Api-Token <YOUR_EXISTING_API_TOKEN>" \ -d '{ "name": "NeuBird", "scopes": [ "entities.read", "metrics.read", "problems.read", "problems.write", "settings.read" ] }'Replace:
<your-environment-id>/<environment-id>with your Dynatrace environment ID<managed-host>(Managed only) with your Dynatrace Managed cluster hostname (e.g.,dynatrace.yourcompany.com)<YOUR_EXISTING_API_TOKEN>with a valid token that has permission to create API tokens
Store the generated token securely.
Generate an OAuth Client
Section titled “Generate an OAuth Client”Important: SaaS-only
This section applies only to Dynatrace SaaS. Dynatrace Managed (on-prem) customers cannot create OAuth clients through the account management portal — skip ahead to Connection Fields and use only the Classic API Token.
To authorize NeuBird to access your Dynatrace data, create an OAuth client with appropriate permissions.
-
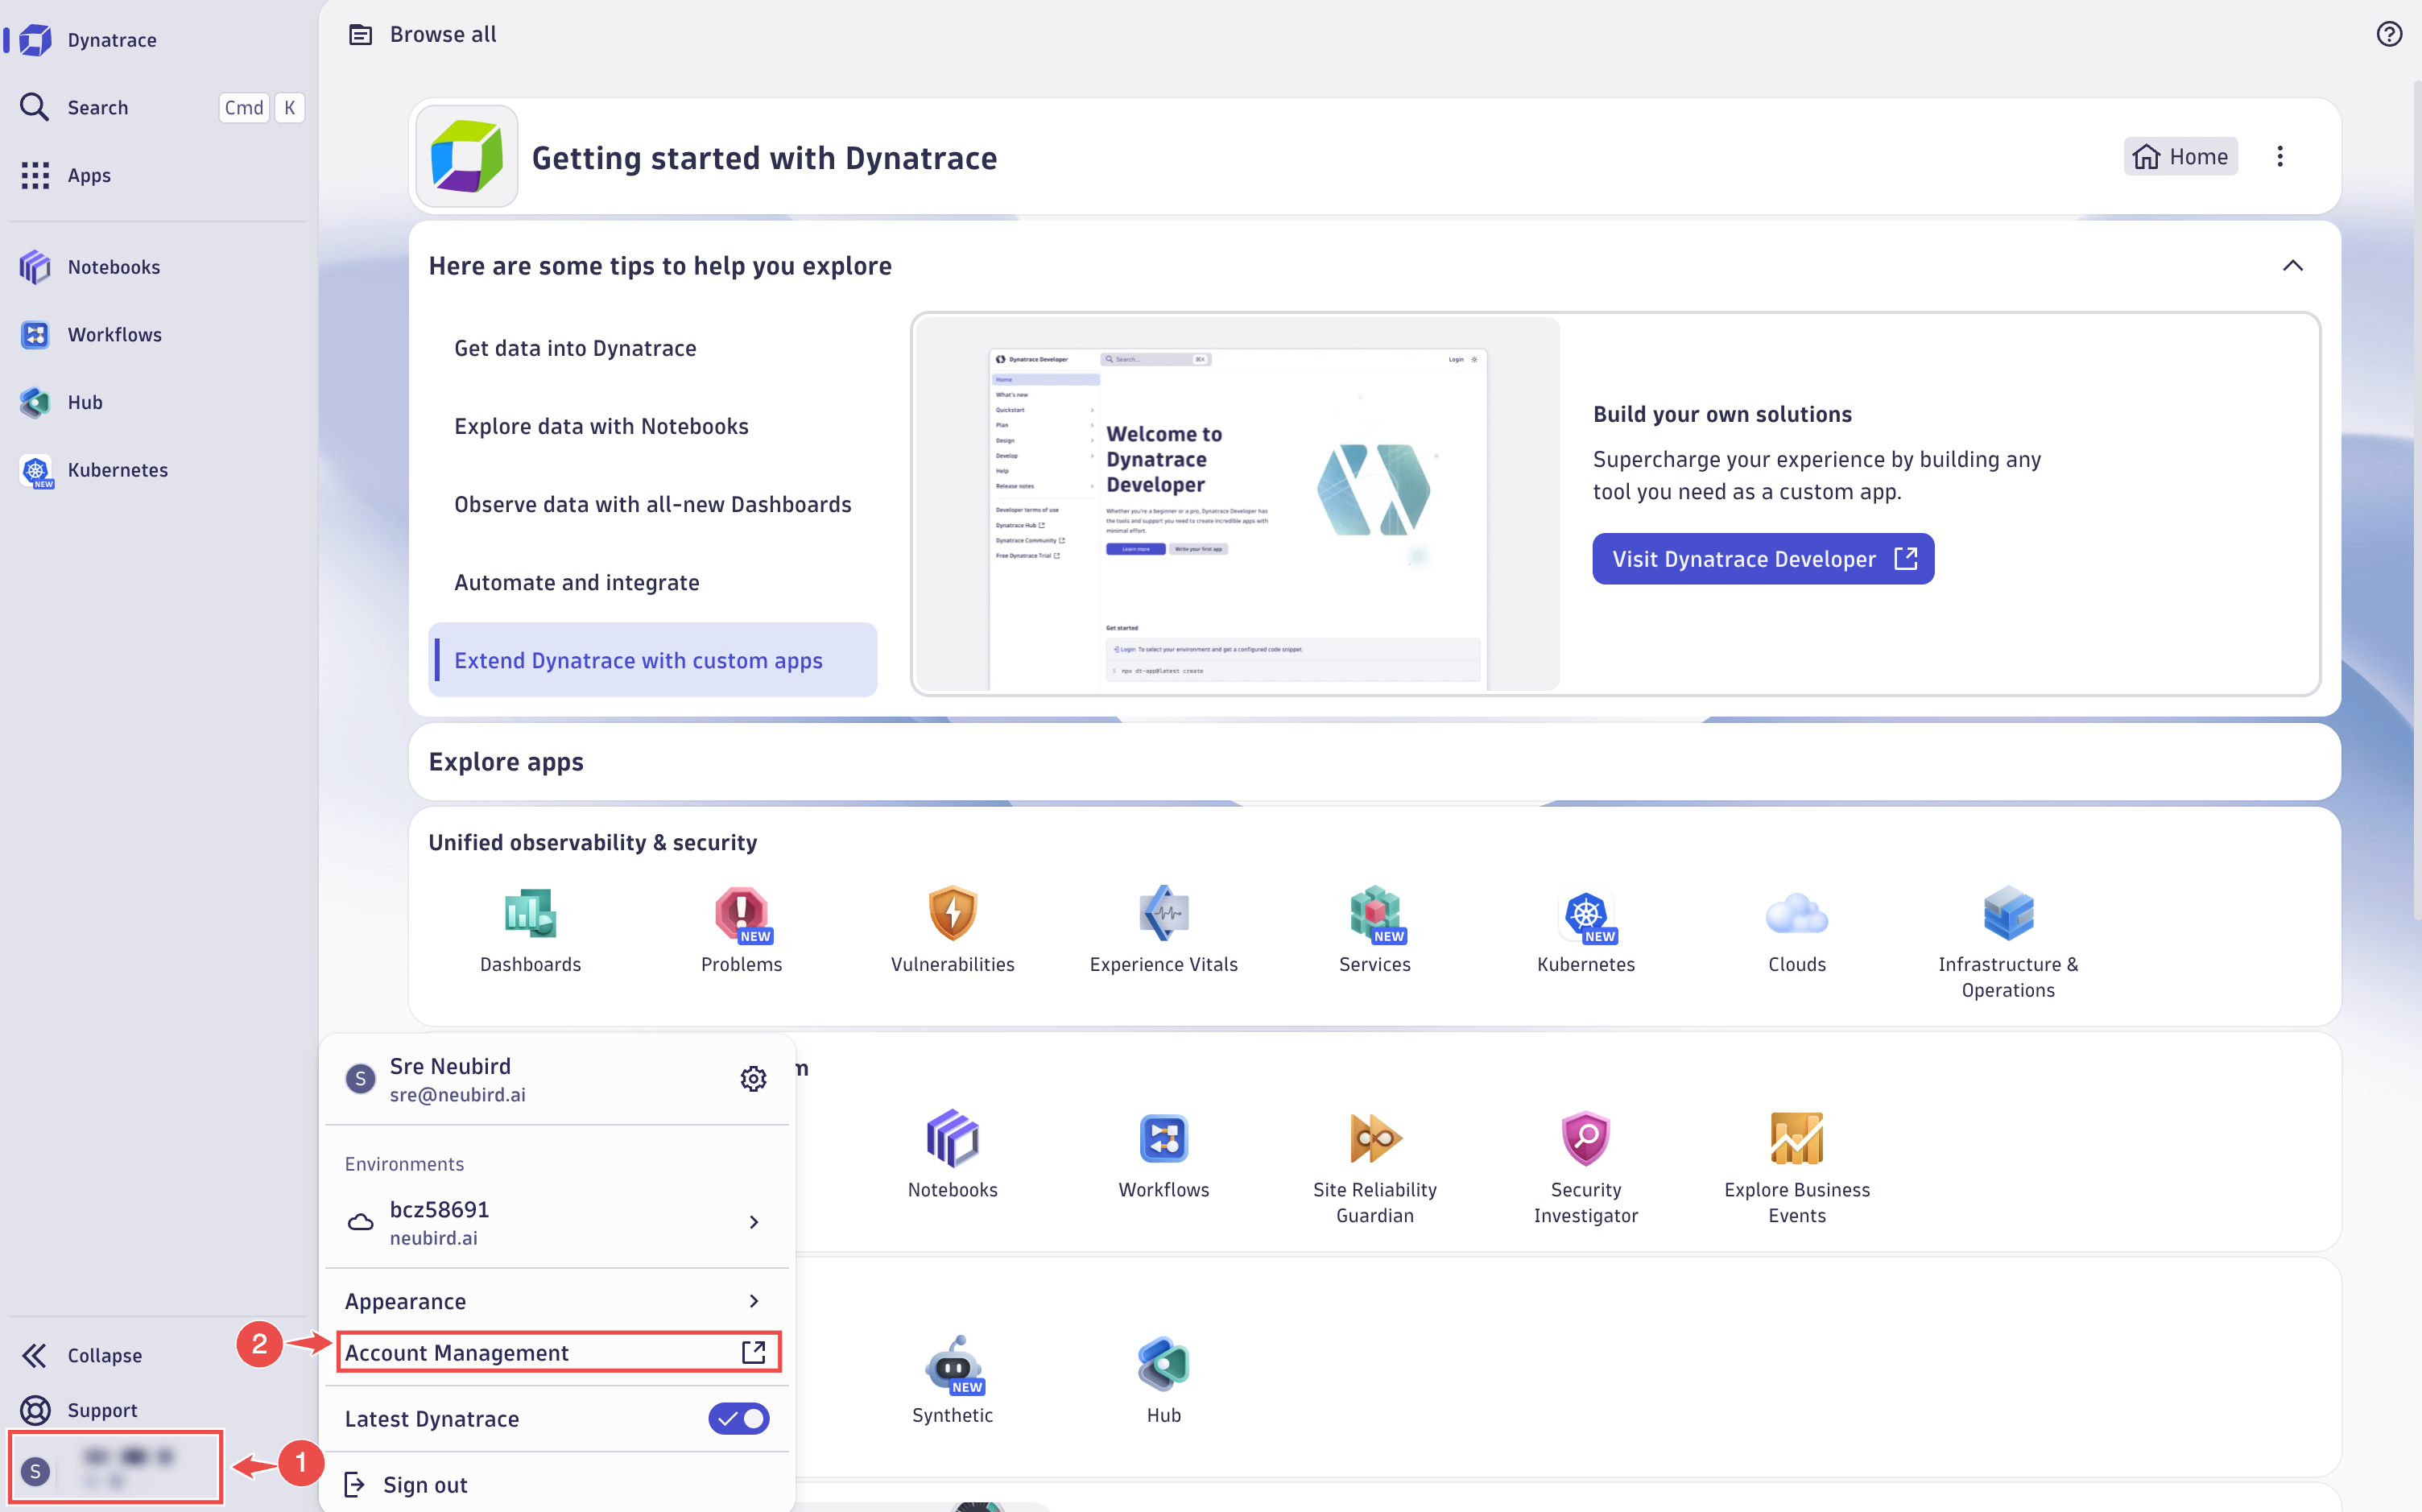
Access Account Management: In the Dynatrace console, navigate to the bottom-left corner of the screen.
- Click your username.
- From the pop-up menu, select Account Management.
-
Open Identity & Access Management:
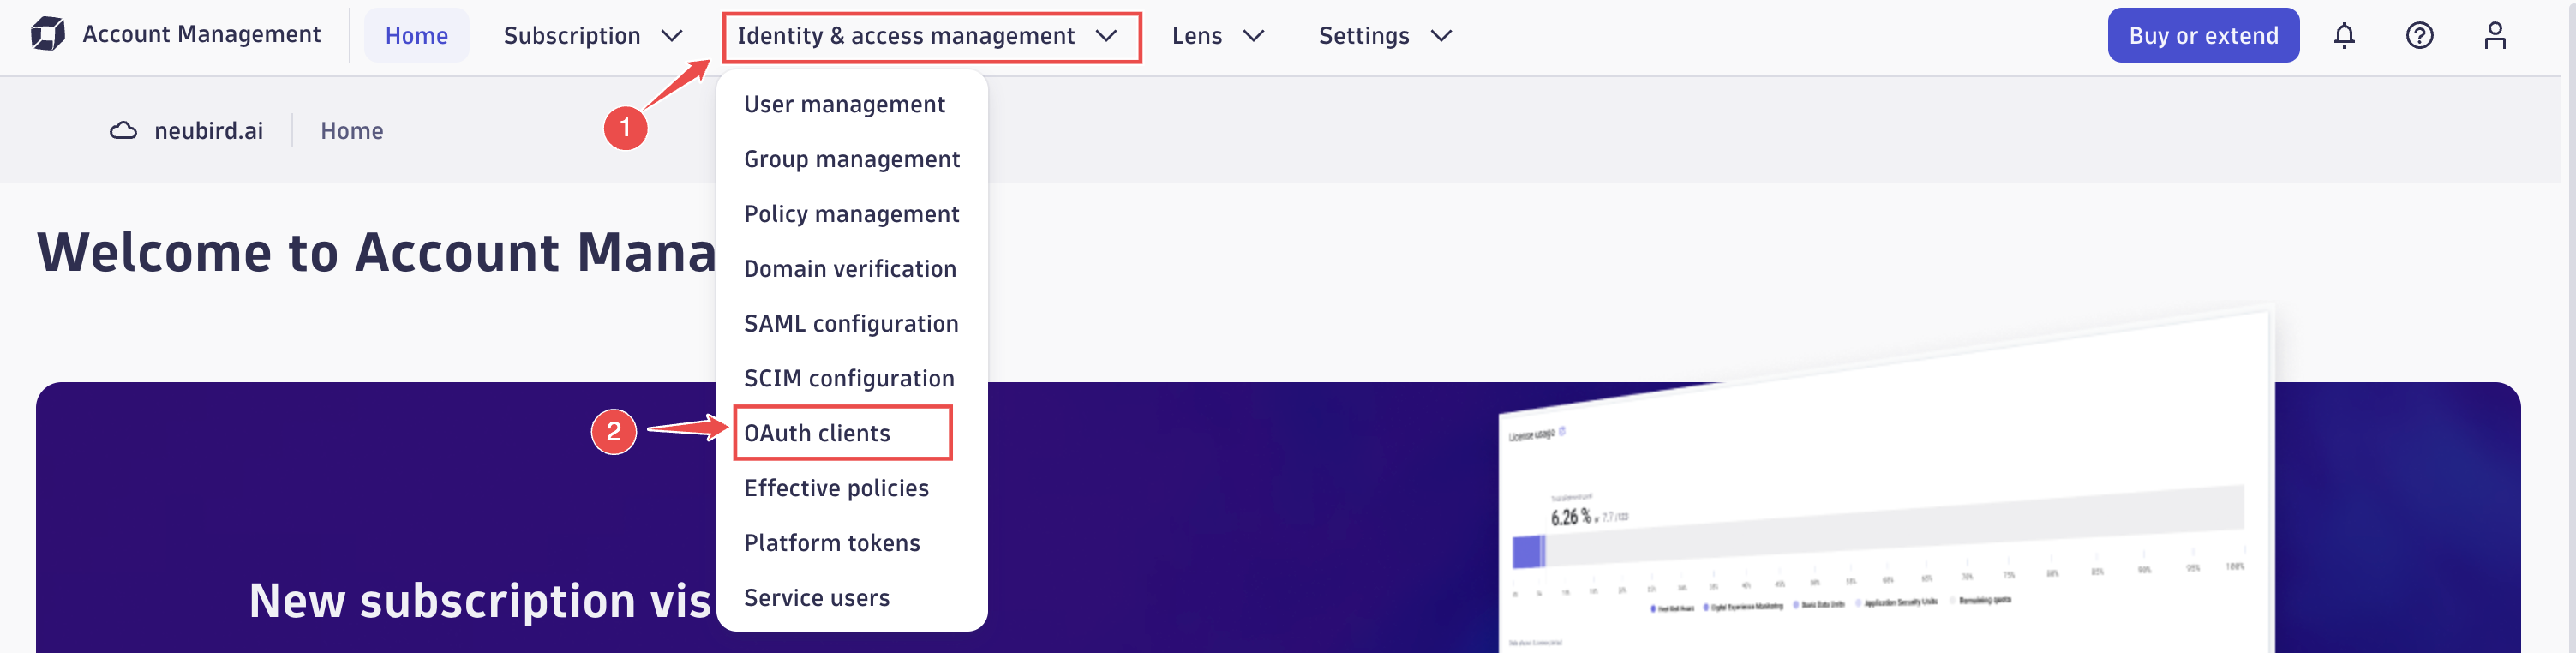
- On the Account Management screen, click Identity & Access Management in the top navigation bar.
- Select OAuth Clients from the list of available options.
-
Create a New OAuth Client:
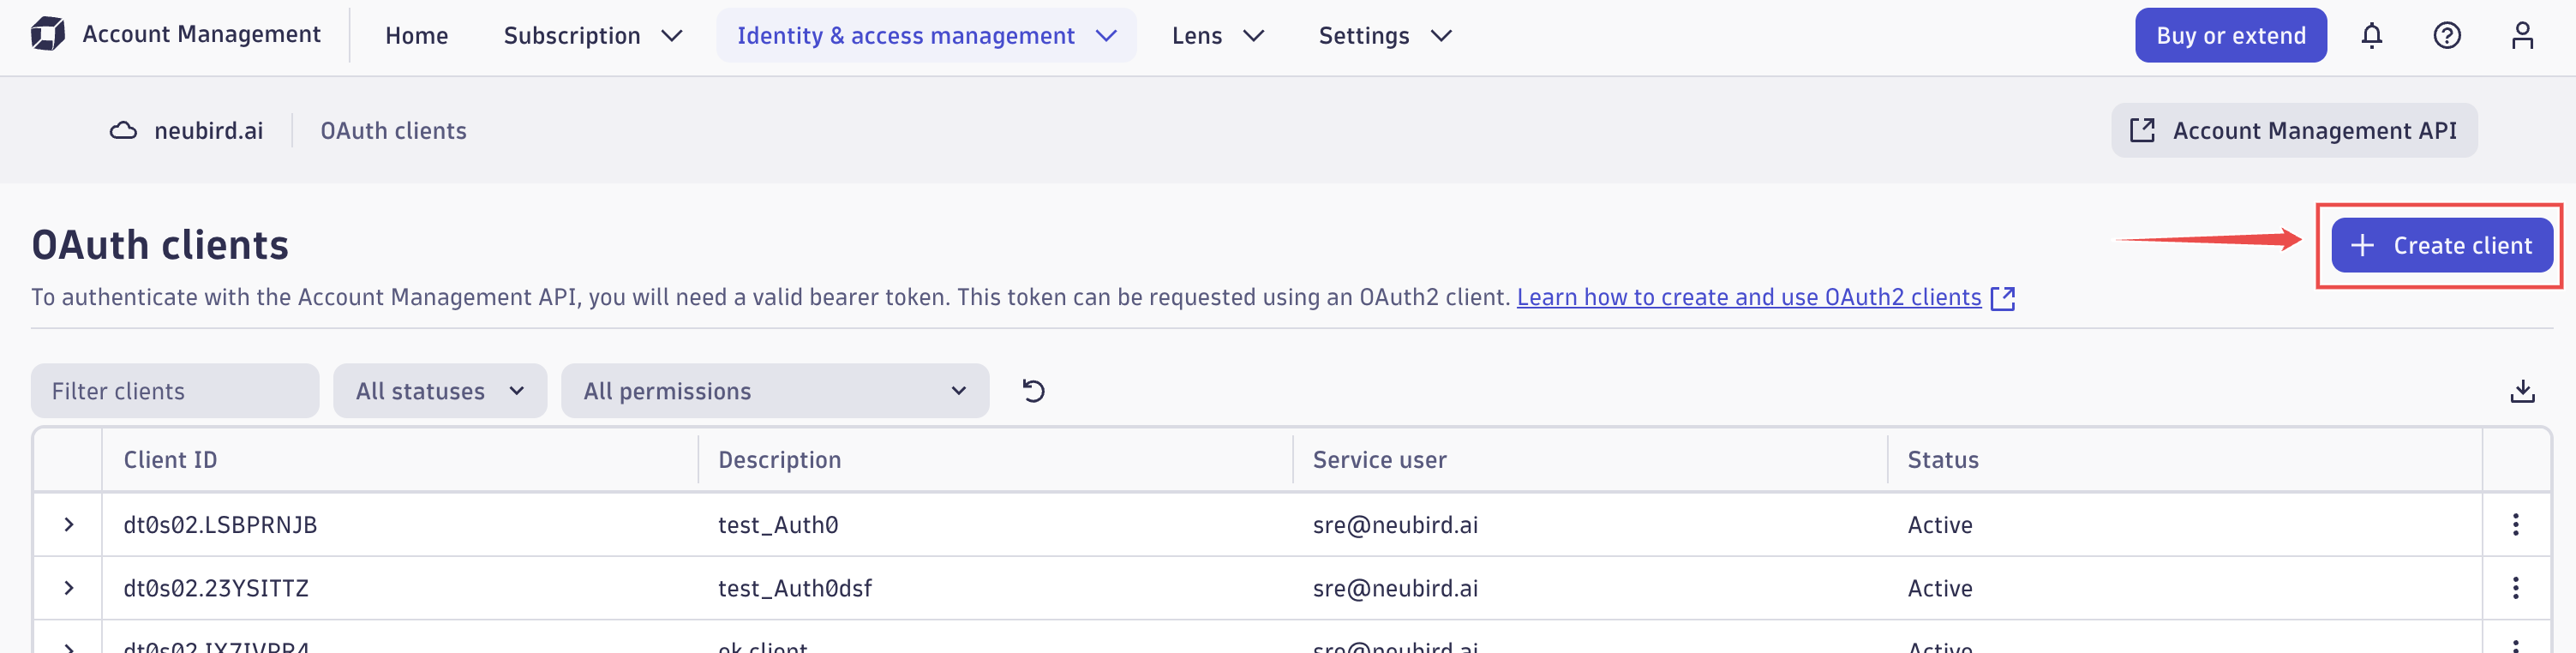
- On the OAuth Clients screen, click the Create client button in the upper-right corner.
- On the Create Client screen:
- Enter the current user’s email address in the Subject user email field.
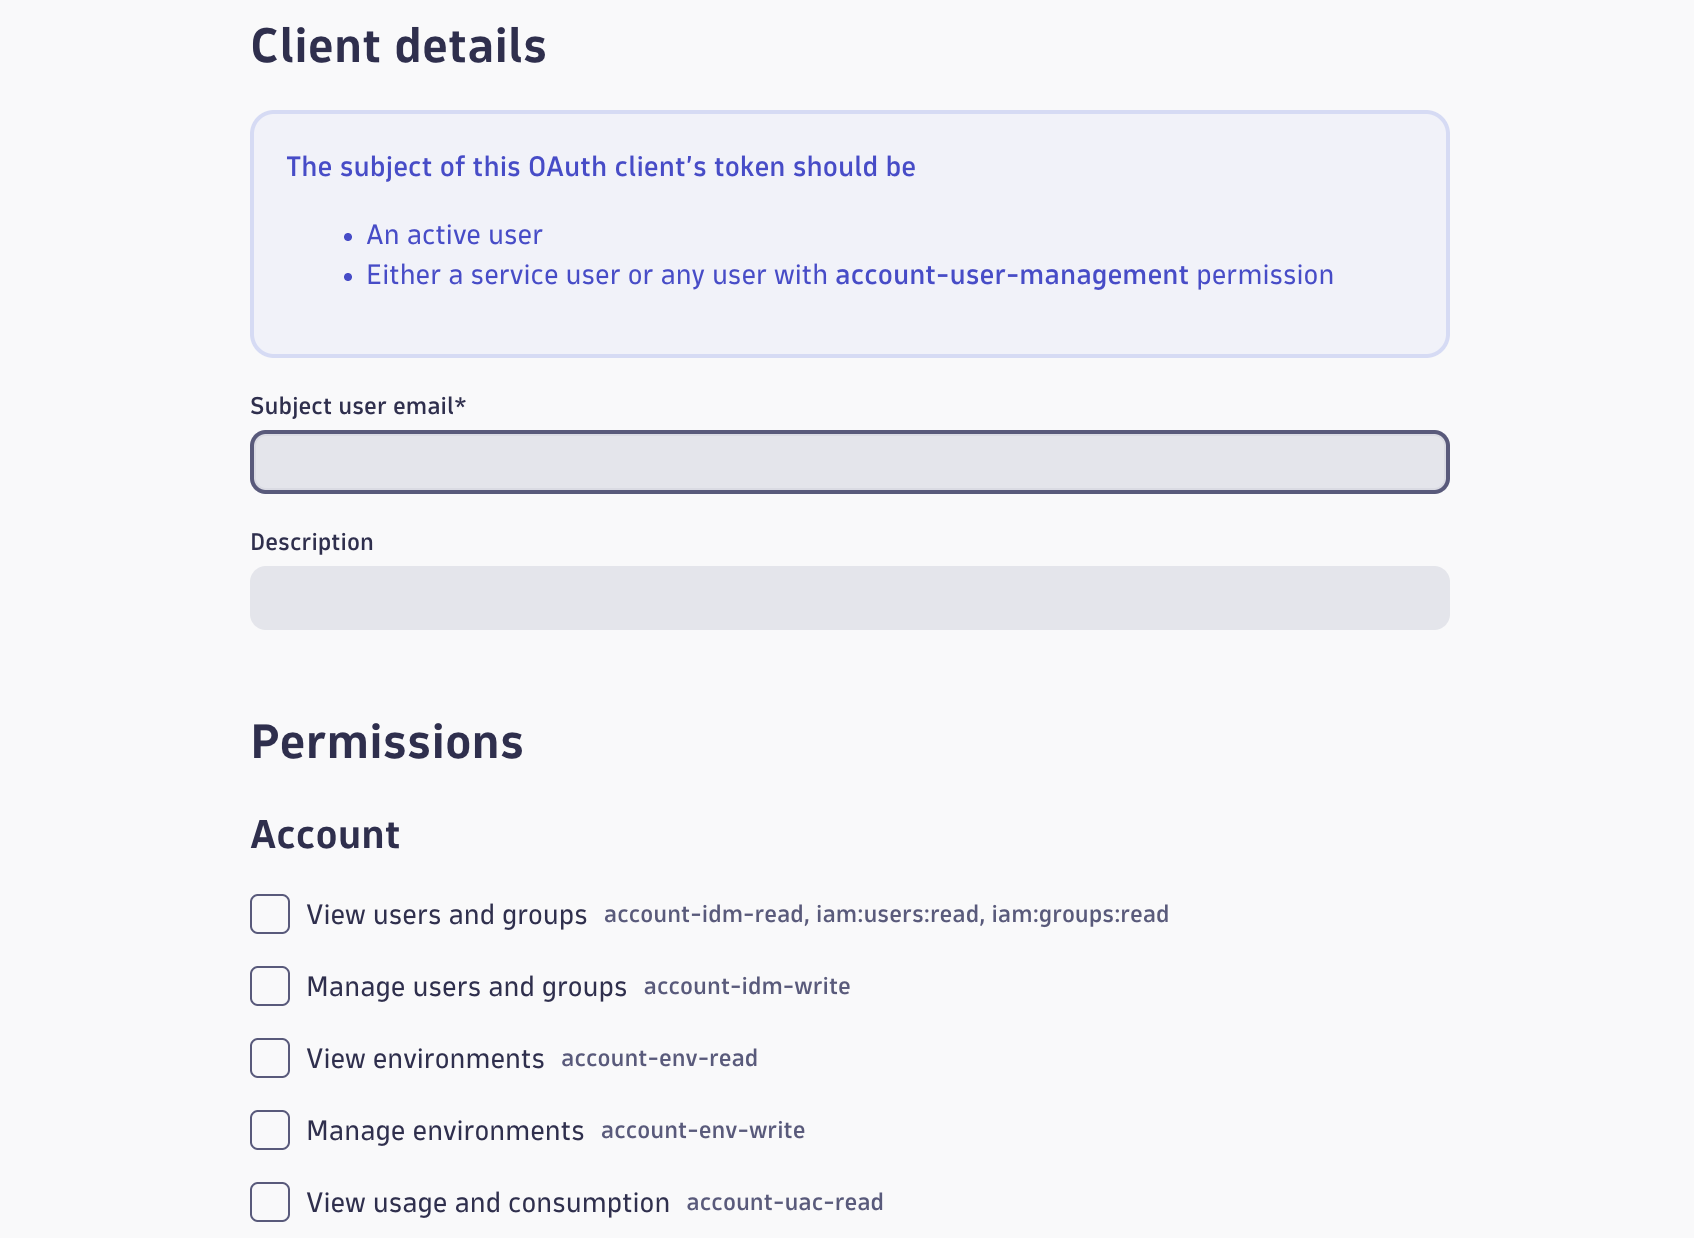
-
Assign Permissions: Grant the following permissions to ensure the OAuth client has the appropriate level of access.
Tip: Permissions
Settings Service
Section titled “Settings Service”
settings:objects:read— View schema settings objects.app-settings:objects:read— View app settings objects.Environment API
Section titled “Environment API”
environment-api:events:read— Read events.environment-api:metrics:read— Read metrics.environment-api:security-problems:write— Manage security problems.environment-api:security-problems:read— Read security problems.environment-api:problems:write— Manage problems.environment-api:problems:read— Read problems.environment-api:entities:read— Read entities.Grail Data Ingest and Query (SaaS-only)
Section titled “Grail Data Ingest and Query (SaaS-only)”The
storage:*permissions below grant access to Grail, which is a Dynatrace SaaS-only service. These permissions do not exist on Dynatrace Managed and should be skipped for Managed deployments.
storage:system:read— View system tables.storage:bizevents:read— View business events.storage:buckets:read— View Grail buckets.storage:metrics:read— View metrics.storage:events:read— View events.storage:logs:read— View logs.storage:smartscape:read— View Smartscape data.storage:entities:read— View entities.storage:spans:read— View spans.storage:security.events:read— View security events.Document Service
Section titled “Document Service”
document:documents:read— View documents.
- Scroll to the bottom of the screen.
- Click the Create client button.
Retrieve OAuth Client Credentials
Section titled “Retrieve OAuth Client Credentials”After the client is created, make note of the following credentials:
- Client ID
- Client Secret
- Login URL — for example:
Important: For NeuBird integration, you must convert the login URL into the live data endpoint.
Replaceappswithlivein the URL.
Example:
- Login URL:
https://bcz58691.apps.dynatrace.com- Live Data Endpoint:
https://bcz58691.live.dynatrace.com
Connection Fields
Section titled “Connection Fields”| Field | Required | Description |
|---|---|---|
| Name | Yes | A unique name for the connection (e.g., Dynatrace-Production-Integration) |
| Description | No | A short description of the integration’s purpose or scope |
| Endpoint | Yes | The Dynatrace environment endpoint URL. SaaS: the live data endpoint (e.g., https://bcz58691.live.dynatrace.com) — replace apps with live in the login URL. Managed (on-prem): https://<managed-host>/e/<environment-id> (e.g., https://dynatrace.yourcompany.com/e/abc12345); the “replace apps with live” instruction does not apply. |
| Client ID | SaaS only | The Client ID generated when creating the OAuth client in Dynatrace. Not used for Managed. |
| Client Secret | SaaS only | The Client Secret associated with the Client ID. Not used for Managed. |
For general instructions on creating and managing connections, see the Connections Overview.