

Projects
Overview
Section titled “Overview”The Projects page is where you define project workspaces that scope investigations, connections, labels, and agent behavior. Use it to separate environments (for example, Production vs. Staging) or teams.
Page Controls
Section titled “Page Controls”At the top of the page, you can use:
- Project count next to the title
- Search projects to filter by project name, description, connection names, and labels
- Sort menu (criticality, updated, name, label)
- Grid/List toggle to switch layouts
- + Add Project to open the project creation flow
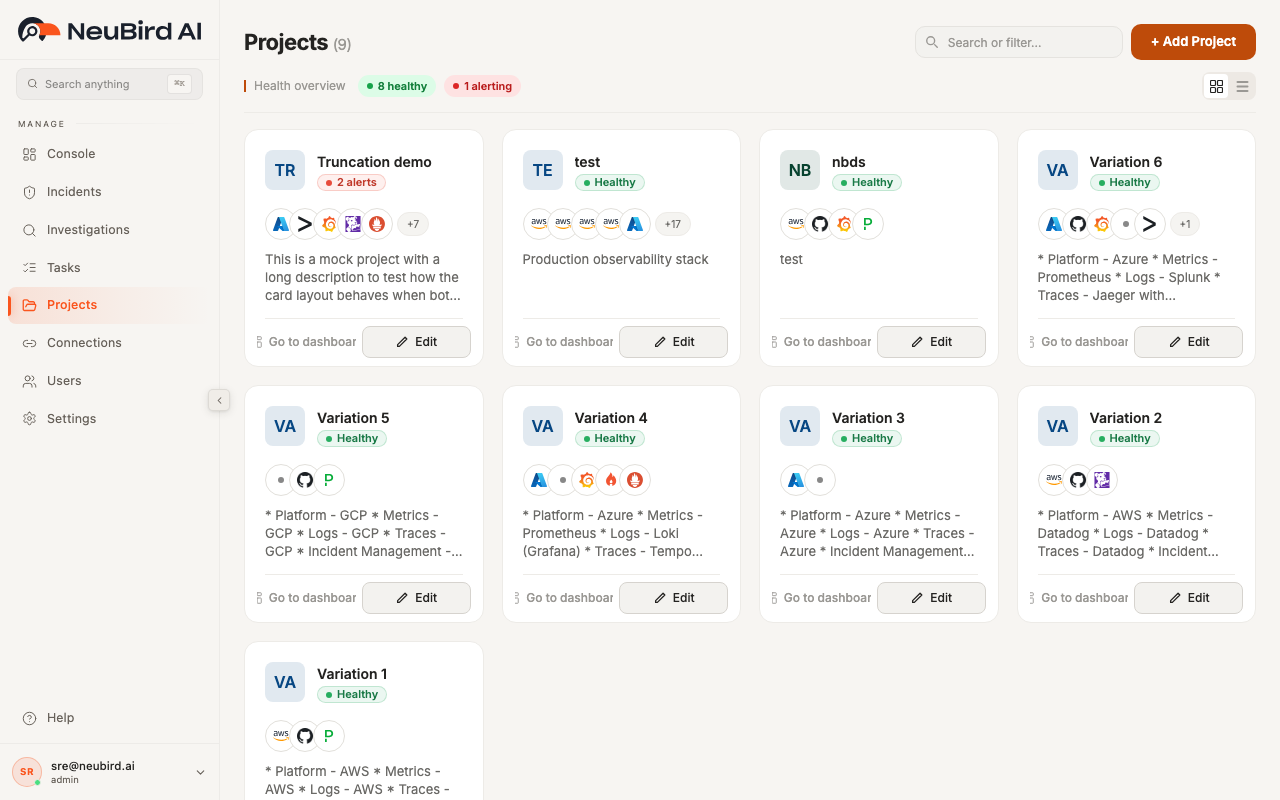
Project Cards (Grid View)
Section titled “Project Cards (Grid View)”Each card gives a quick operational summary:
- Project name, icon/initial, and optional description
- Connection chips with logos
- Labels (including overflow badges)
- Optional state badges such as newly created/updated highlights
- Pin control (keeps important projects first)
- Quick actions for Console, Refresh, and Edit
The card menu also exposes project-level actions (for example, opening instructions or deleting the project, based on your permissions).
List View
Section titled “List View”List view shows the same projects in a table with sortable columns:
- Project
- Description
- Labels
- Connections
- Actions (Console, Refresh, Edit, Pin)
Use list view when you need faster scanning across many projects.
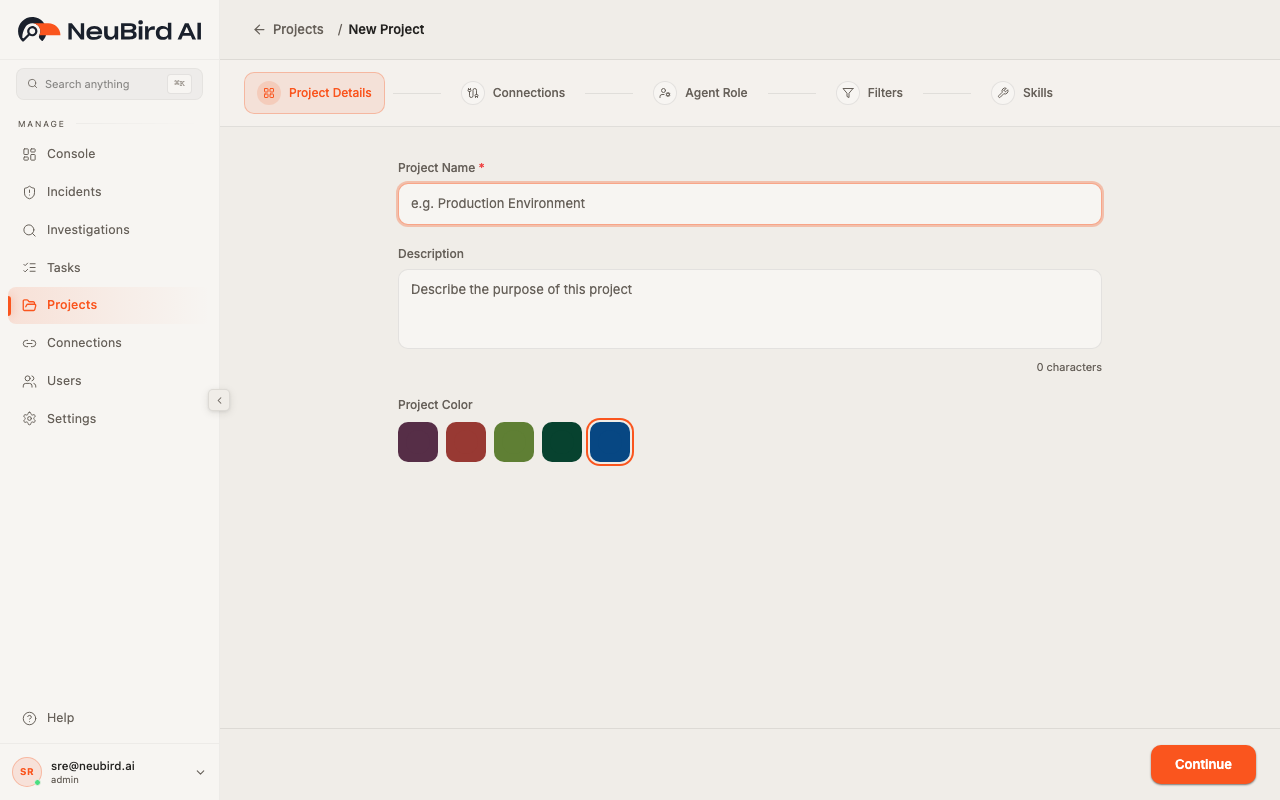
Creating and Editing Projects
Section titled “Creating and Editing Projects”Click + Add Project to open the multi-step setup flow.
The setup includes:
- Project Details - name, description, icon styling, labels
- Connections - attach supported integrations to this project
- Agent Setup / Config - define role, focus, rules, and optional tuning
- Review - confirm selections before final save
When you click Edit on an existing project, the same flow opens prefilled so you can safely update configuration.
Creating Ingest and Automation Filters
Section titled “Creating Ingest and Automation Filters”Inside project setup, the Ingest filters and Automation filters sections let you reduce noise or trigger automation on matching alerts.
- Open Edit on a project.
- Scroll to Ingest filters or Automation filters.
- Click Add filter to open the filter builder modal.
The filter builder uses a chat on the left and a live preview on the right. Answer the agent’s questions, review sample matches and impact in the preview, then click Save filter when ready. The modal closes after the agent saves the rule.
For step-by-step detail, open Help in the filter builder header (opens the filter builder guide) or see Projects → Edit → Add filter.
Screenshot
projects-filter-builder.pngis captured whennpm run generate-docs:force -- --page projectscan open Edit on a writable project in the test org.
Managing Projects
Section titled “Managing Projects”- Open project in Console: click Console on a row/card.
- Refresh project data: use the refresh control if metadata looks stale.
- Pin / unpin projects: keep important workspaces at the top.
- Delete project: available in project actions; this is permanent.
- Read-only behavior: if your account is read-only, write actions are disabled and tooltips explain why.